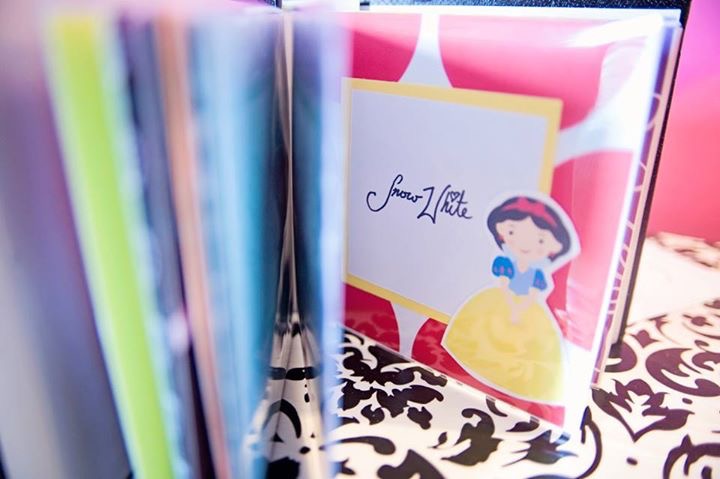
Epcot Spaceship Earth Wall Tutorial!

“Epcot is and will always be in a state of becoming. It will never cease to be a living blueprint of the future.”
When Walt Disney World first closed in March of 2020 for the global pandemic, I knew so many people were saddened. Their job, their happy place, their livelihood was temporarily gone! Since our family visits the parks frequently as well, I knew we’d be missing it too. So, I had to think of some ways to help bring some extra magic into our home while we were away!
So, I decided to create this over the top Spaceship Earth wall in our upstairs hallway! It seemed like the perfect place for it to be since A. Epcot is our family’s favorite park and B. we already had so many Disney themed rooms coming off of this space. So, to bring the magic of the parks home, I decided to take on this paint job!
I at first searched and searched for anything that would make it easier, including wallpaper, wall tiles, stencils…anything. But alas, I knew I wanted this wall to be as close as possible to the real deal, so painting it seemed like the best and most cost efficient option.
So, let’s get down to the nitty gritty: how YOU can create this in your home yourself! It may be time consuming, but it is not a super hard project.
Materials needed:
Black wall paint
3 shades of grey wall paint
1/4 inch thin blue painter’s tape (more on that later!)
Paint roller and roller sponges
Pencil
1 inch corner-cut paint brush
Regular sized painter’s tape for ceiling and floor trim
Small touch up brush (we used kid’s acrylic paint brushes)
Yard stick
Ladder
Now, for paint colors.
I actually mixed my own paint colors for this job! I had black, white, and grey in our garage and so I created three shades of grey from those. Basically, I was being cheap and didn’t want to buy new paint!
But, for those who want ideas for grey colors you can purchase, I found these options below, hoping they might be helpful!
Sherwin Williams:
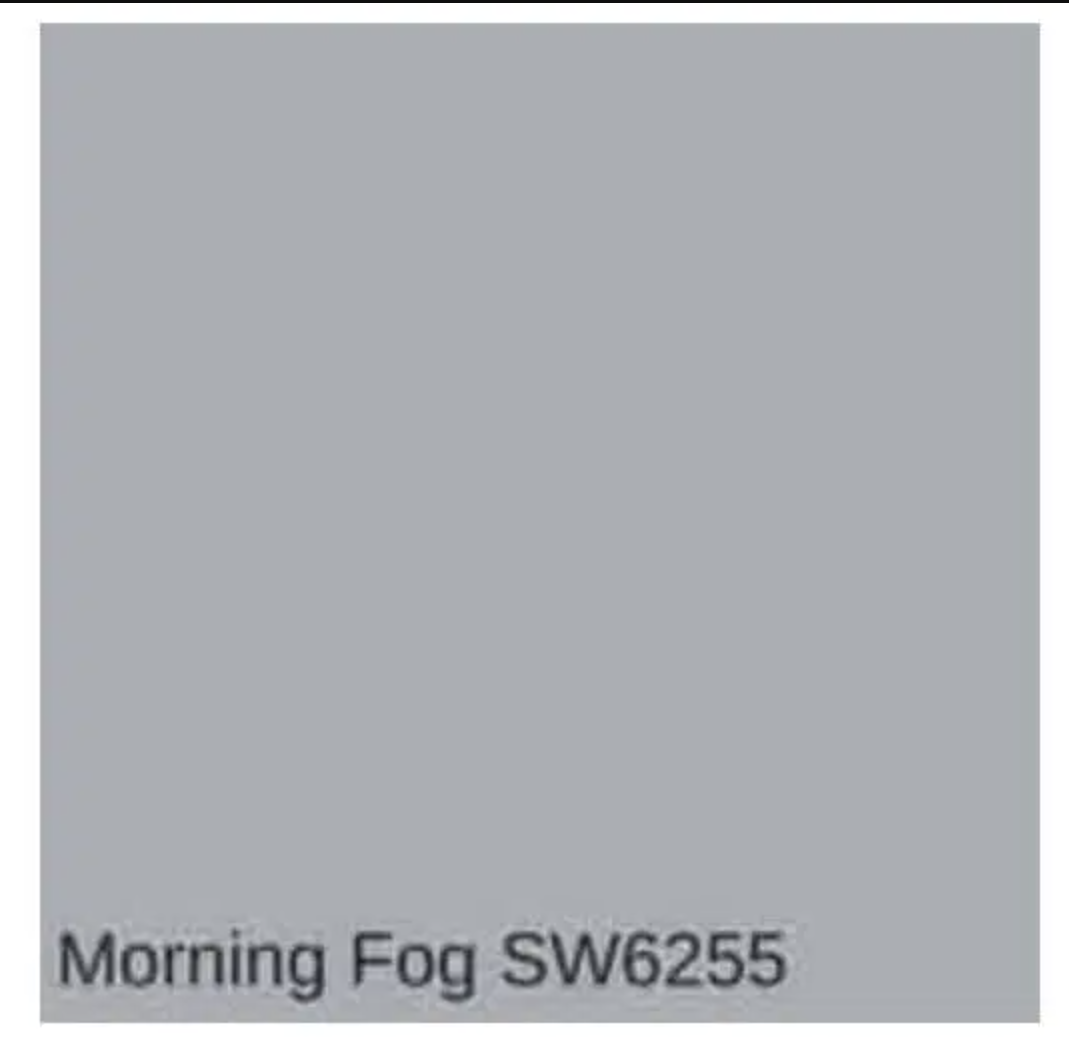
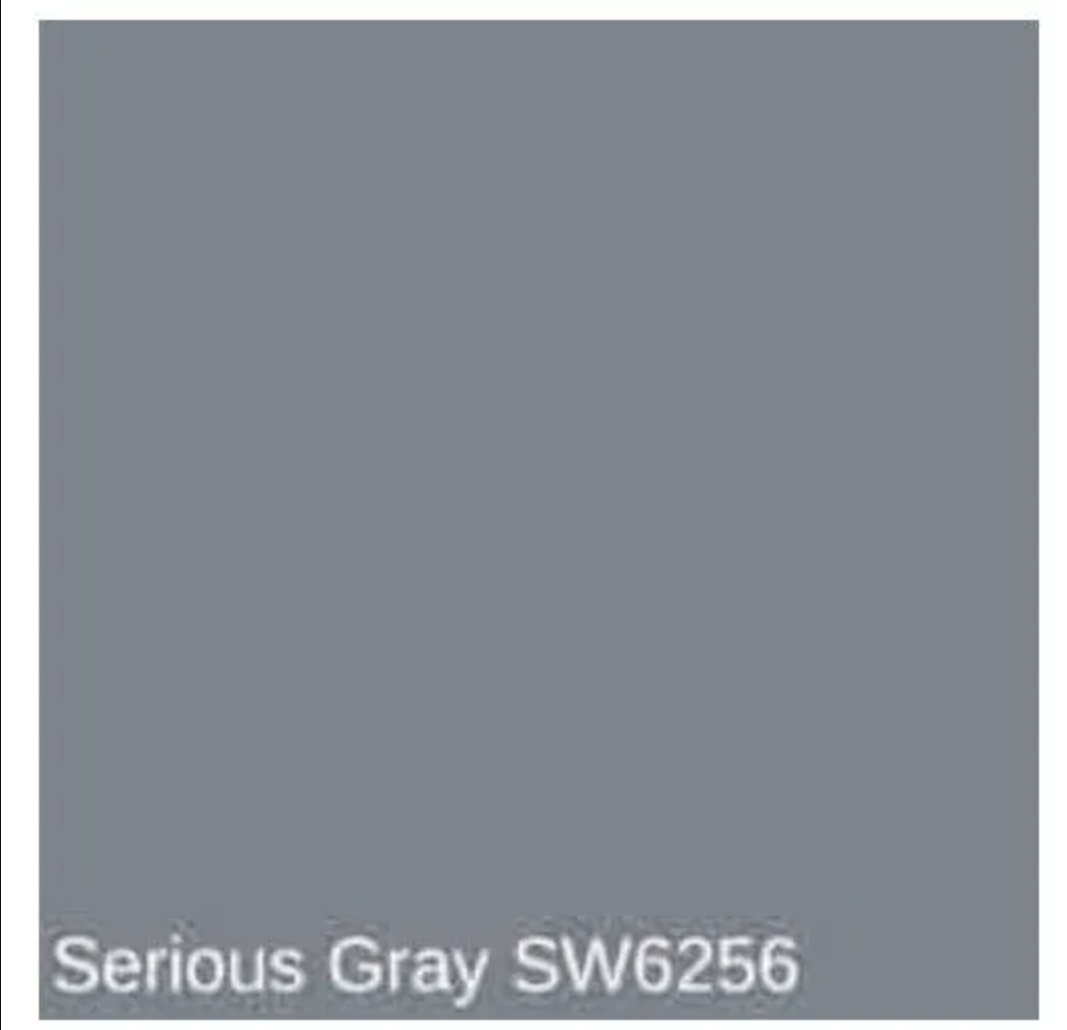
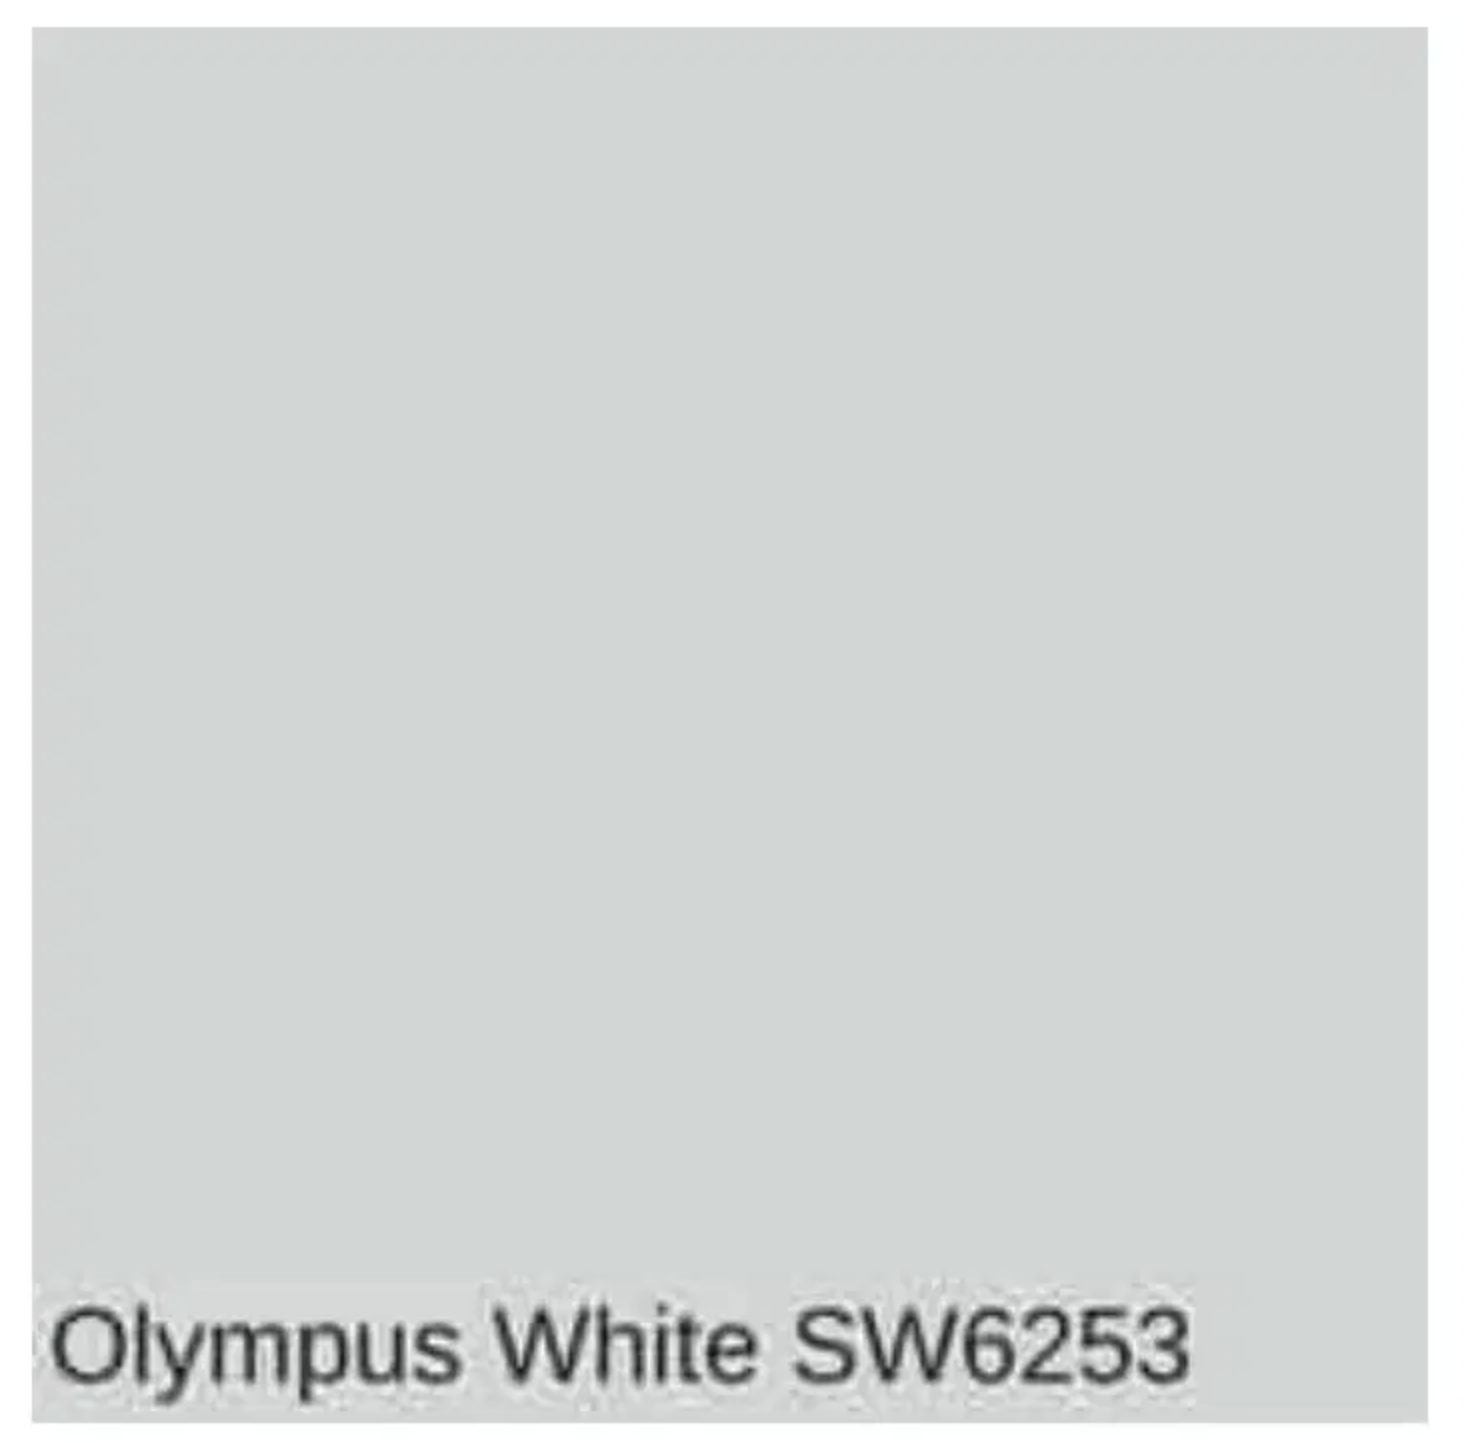
I’d say you’ll need half a gallon of each color to be safe, and for touch-ups. Also, having a solo cup handy while painting so you’ll always have your color in your hand was a great plan and time saver.
Now, let’s get down to business! Here are the steps to complete this project:
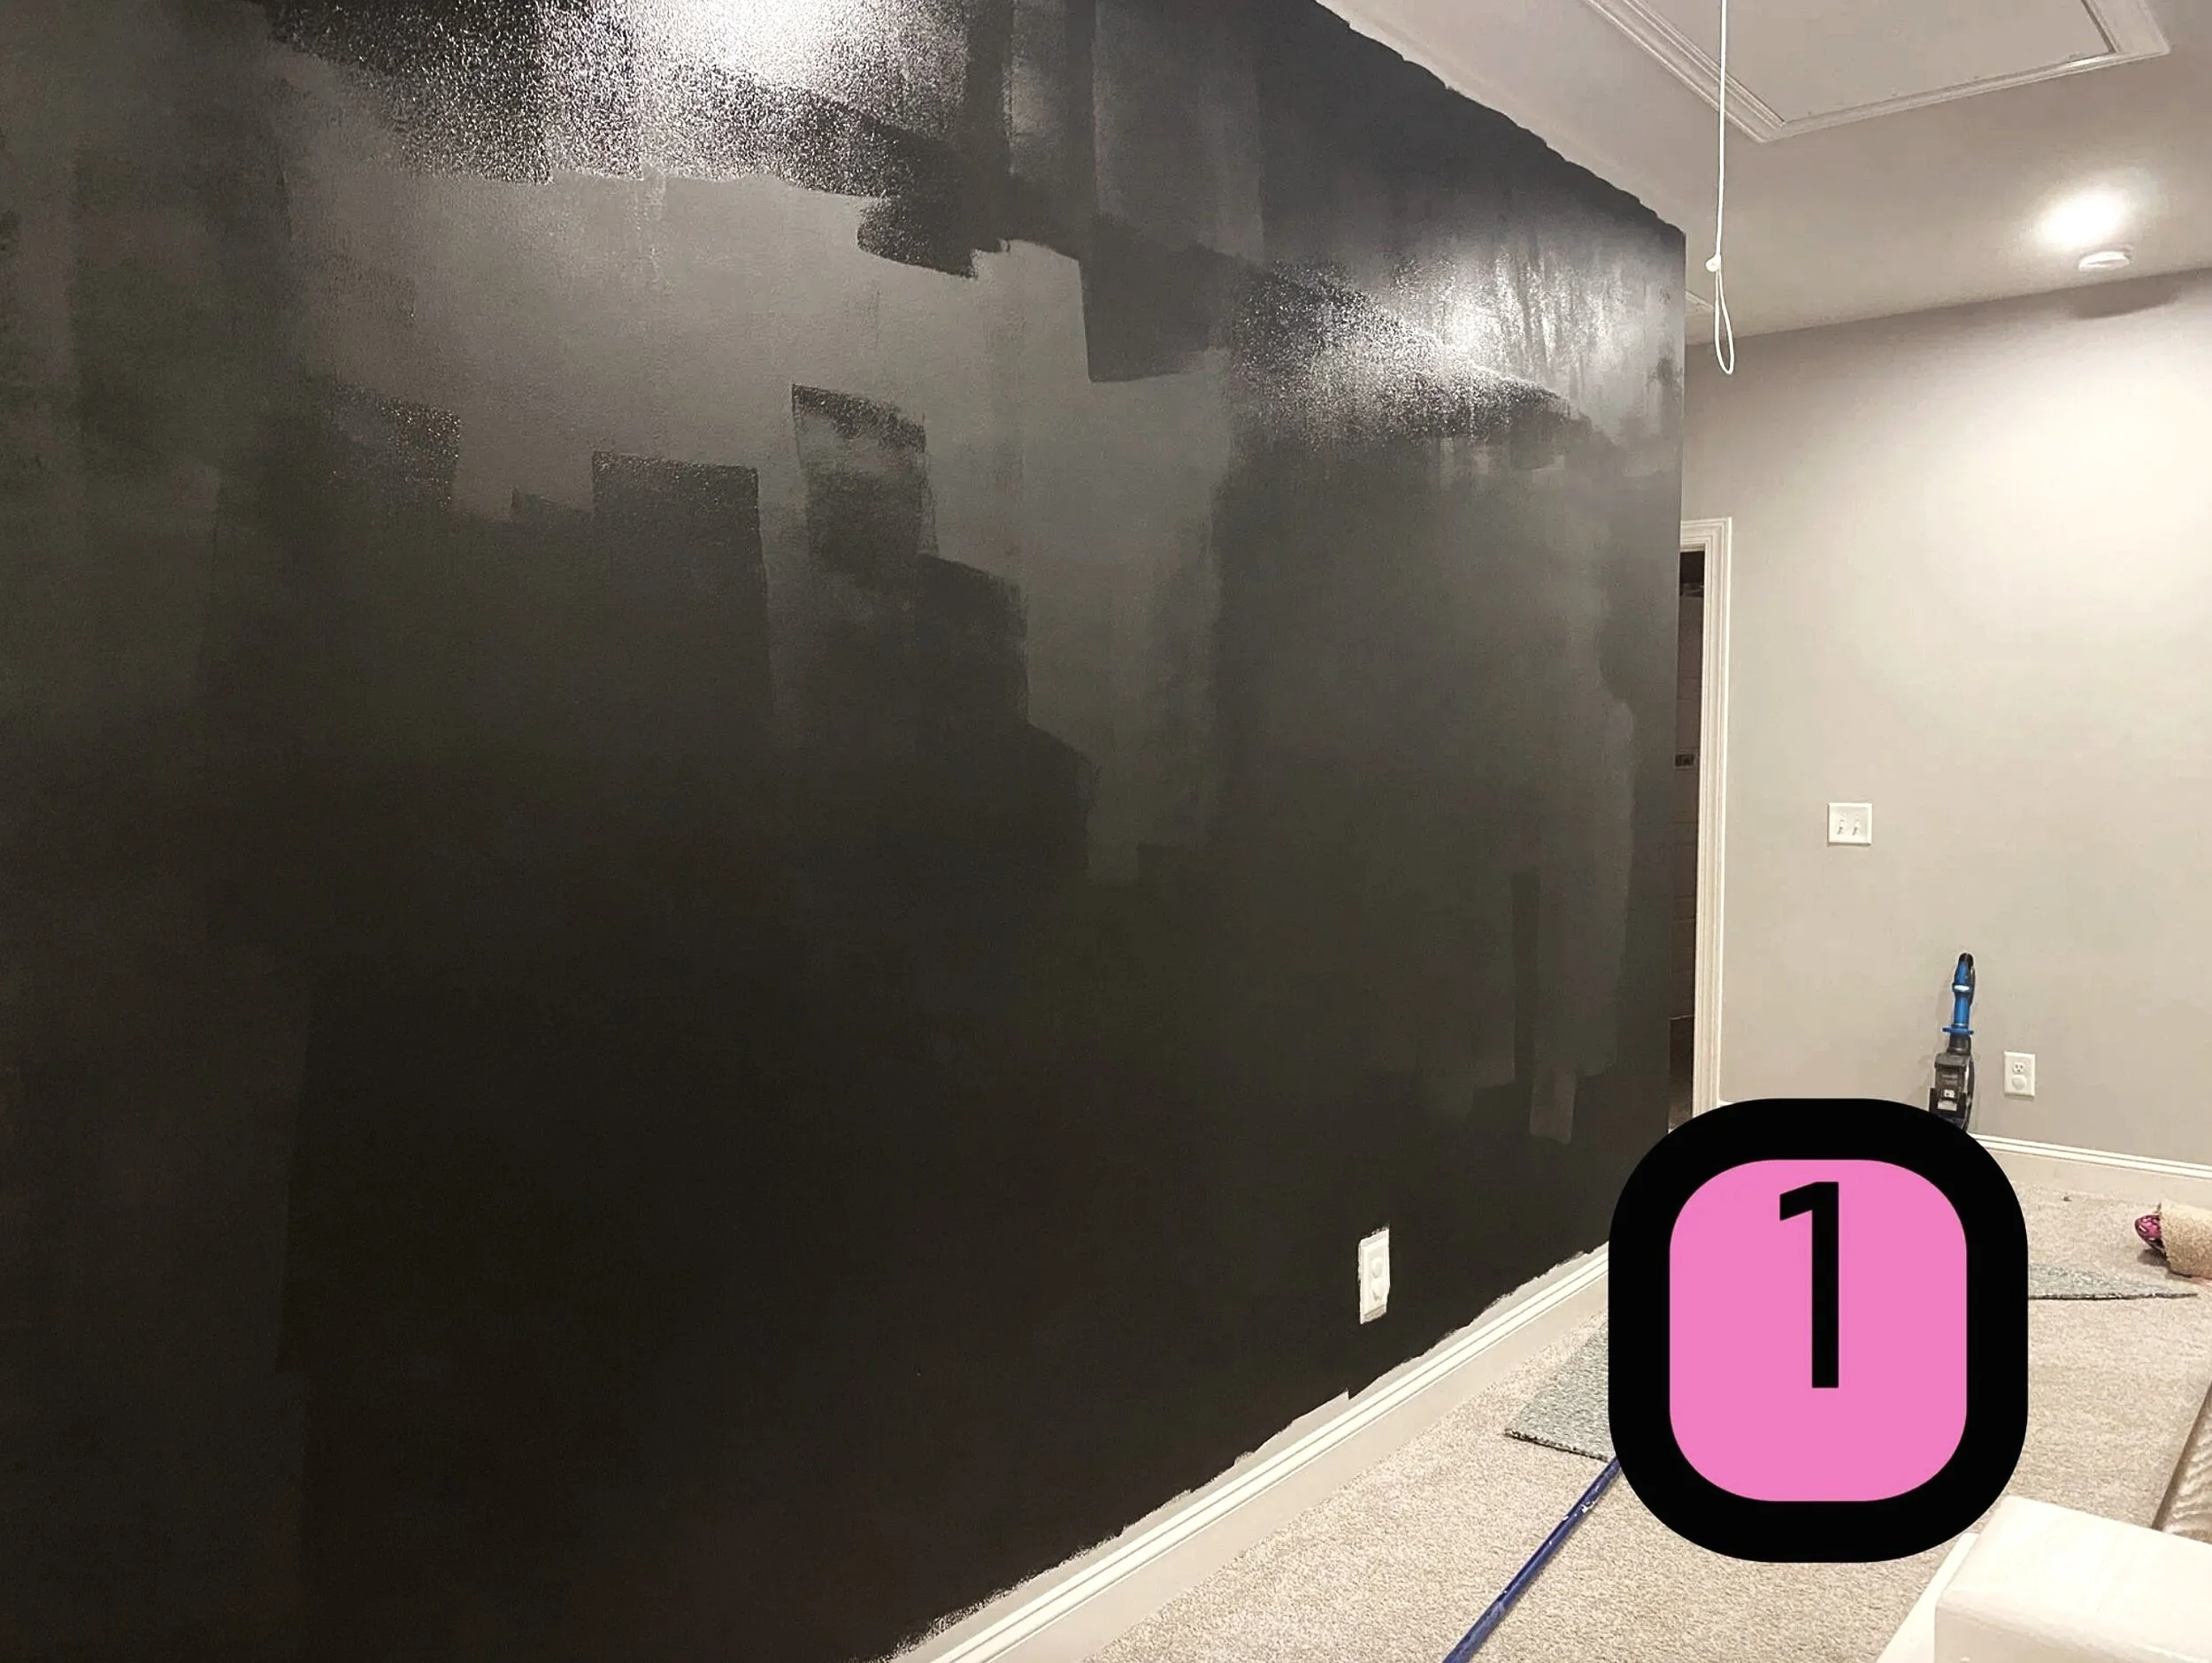
Step 1: base coat
Step 1: Paint your wall black, including trimming it out.
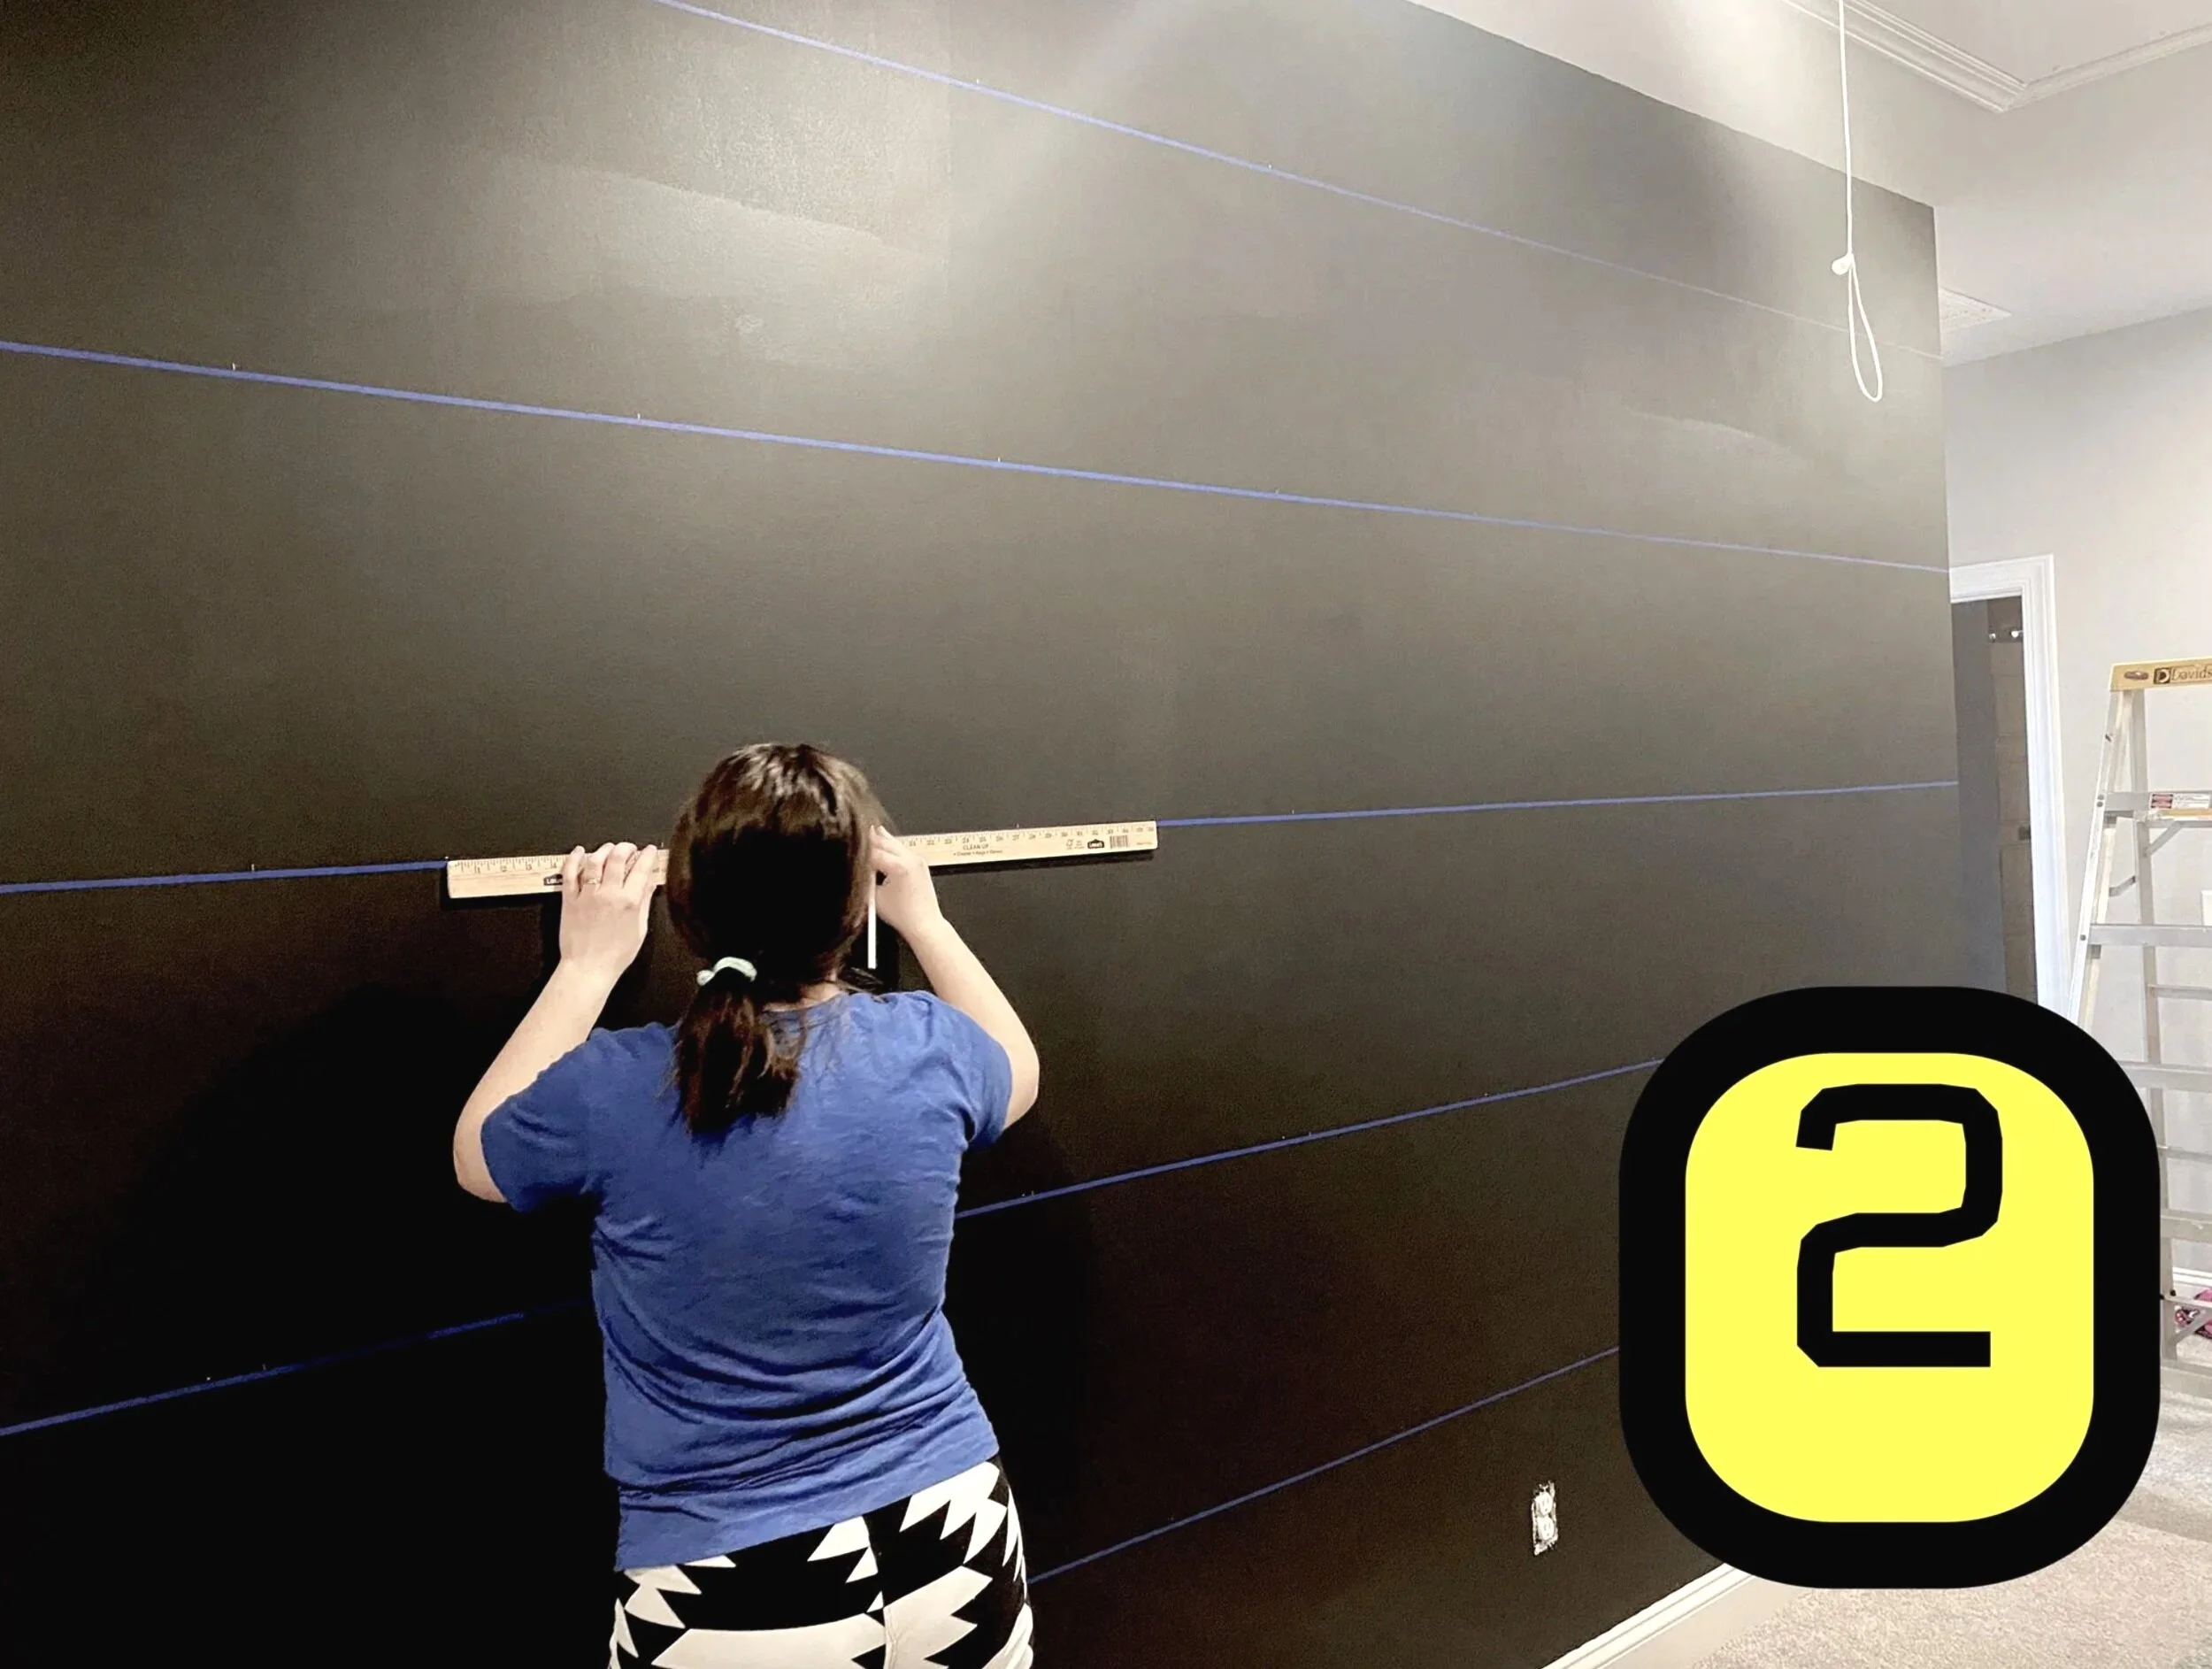
Step 2: lines
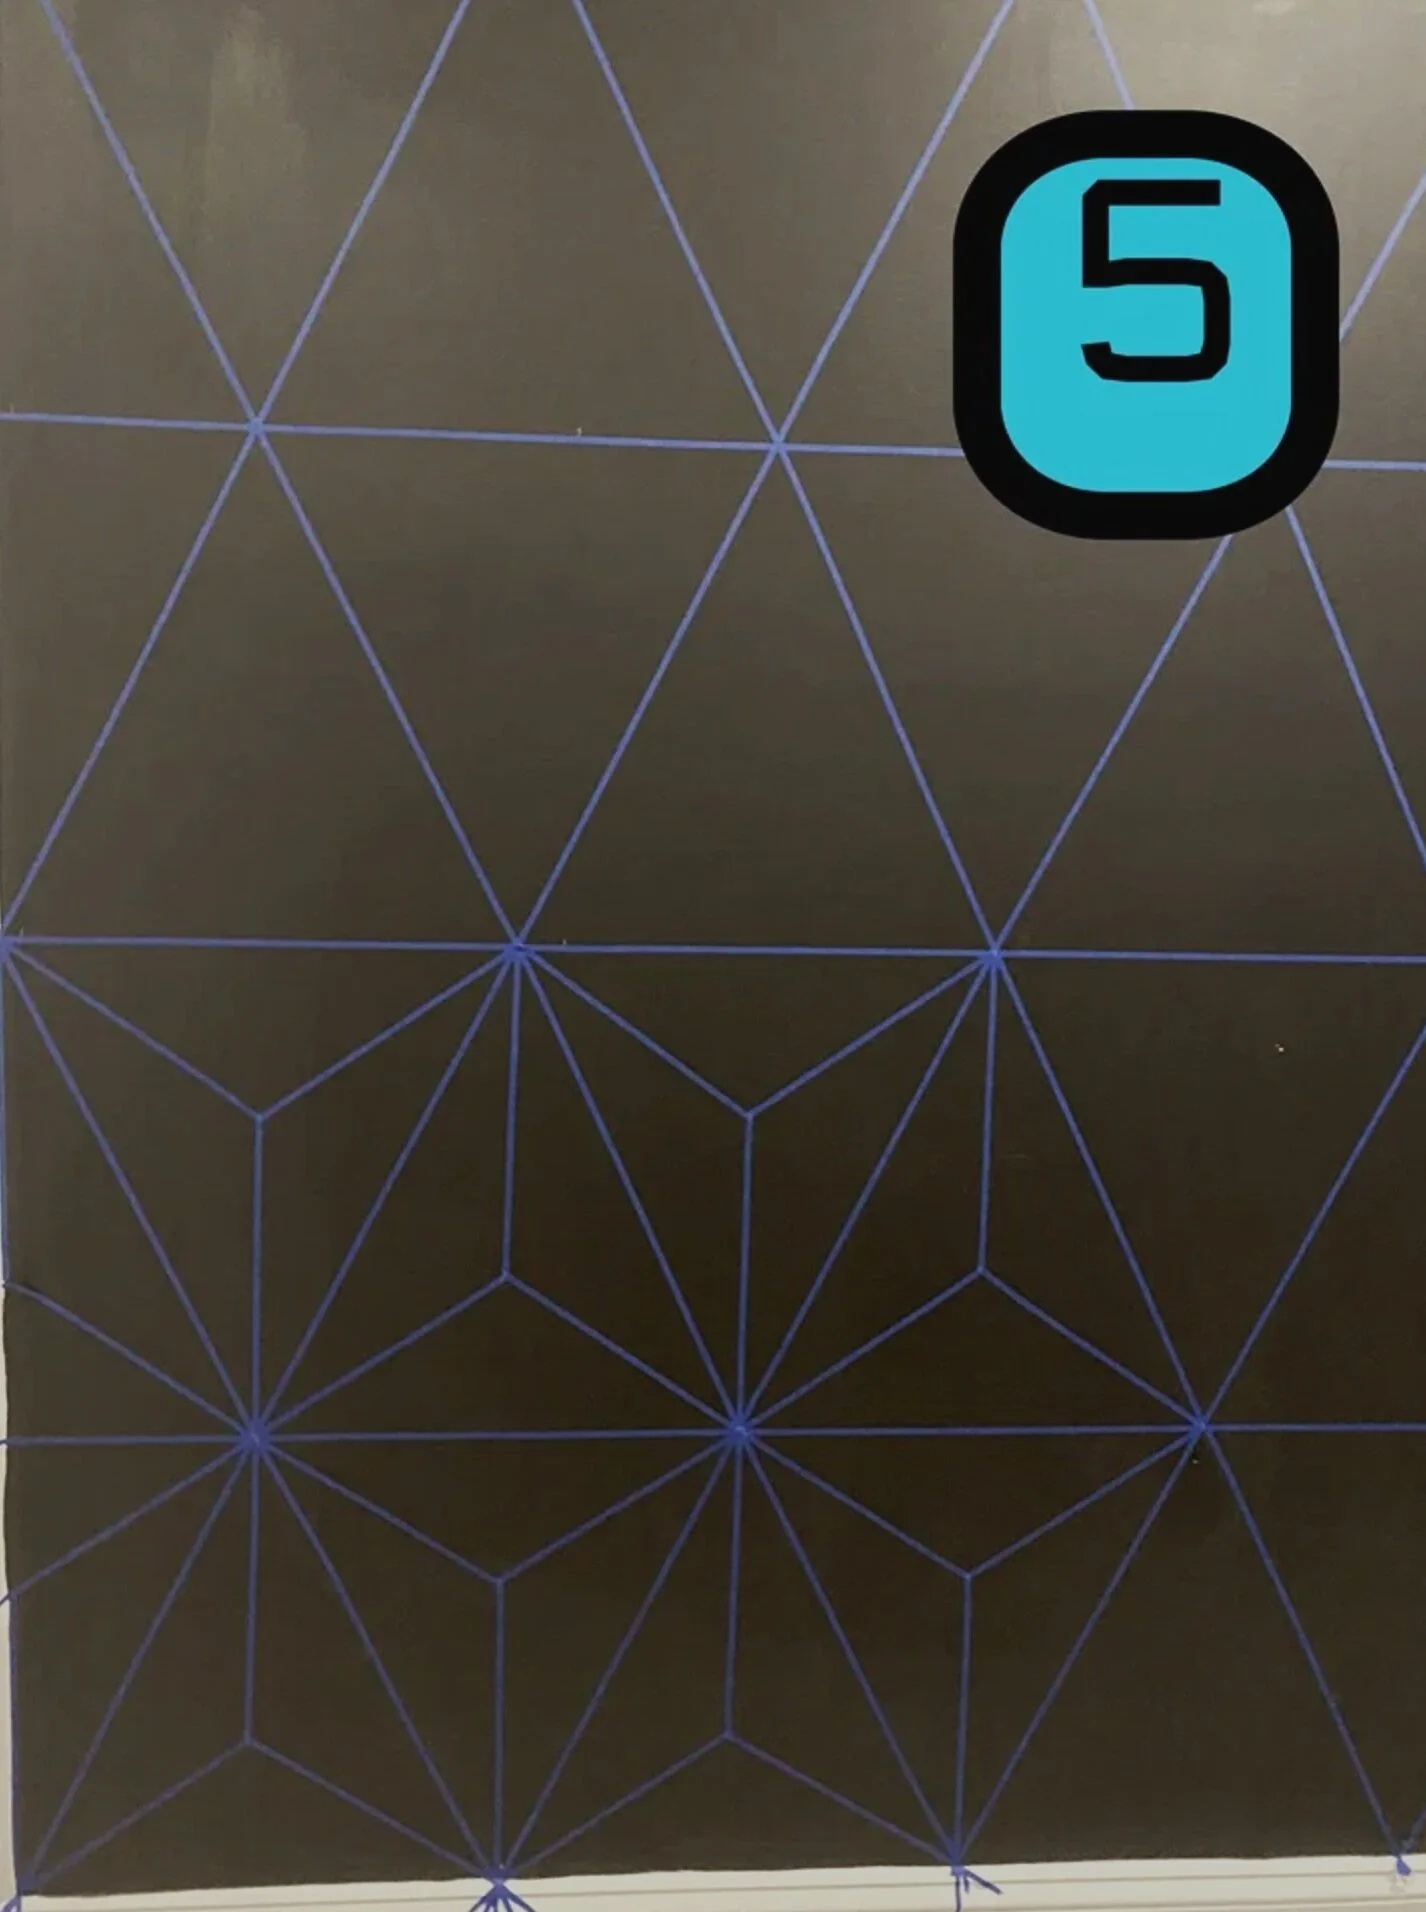
Step 2: Tape your horizontal lines!
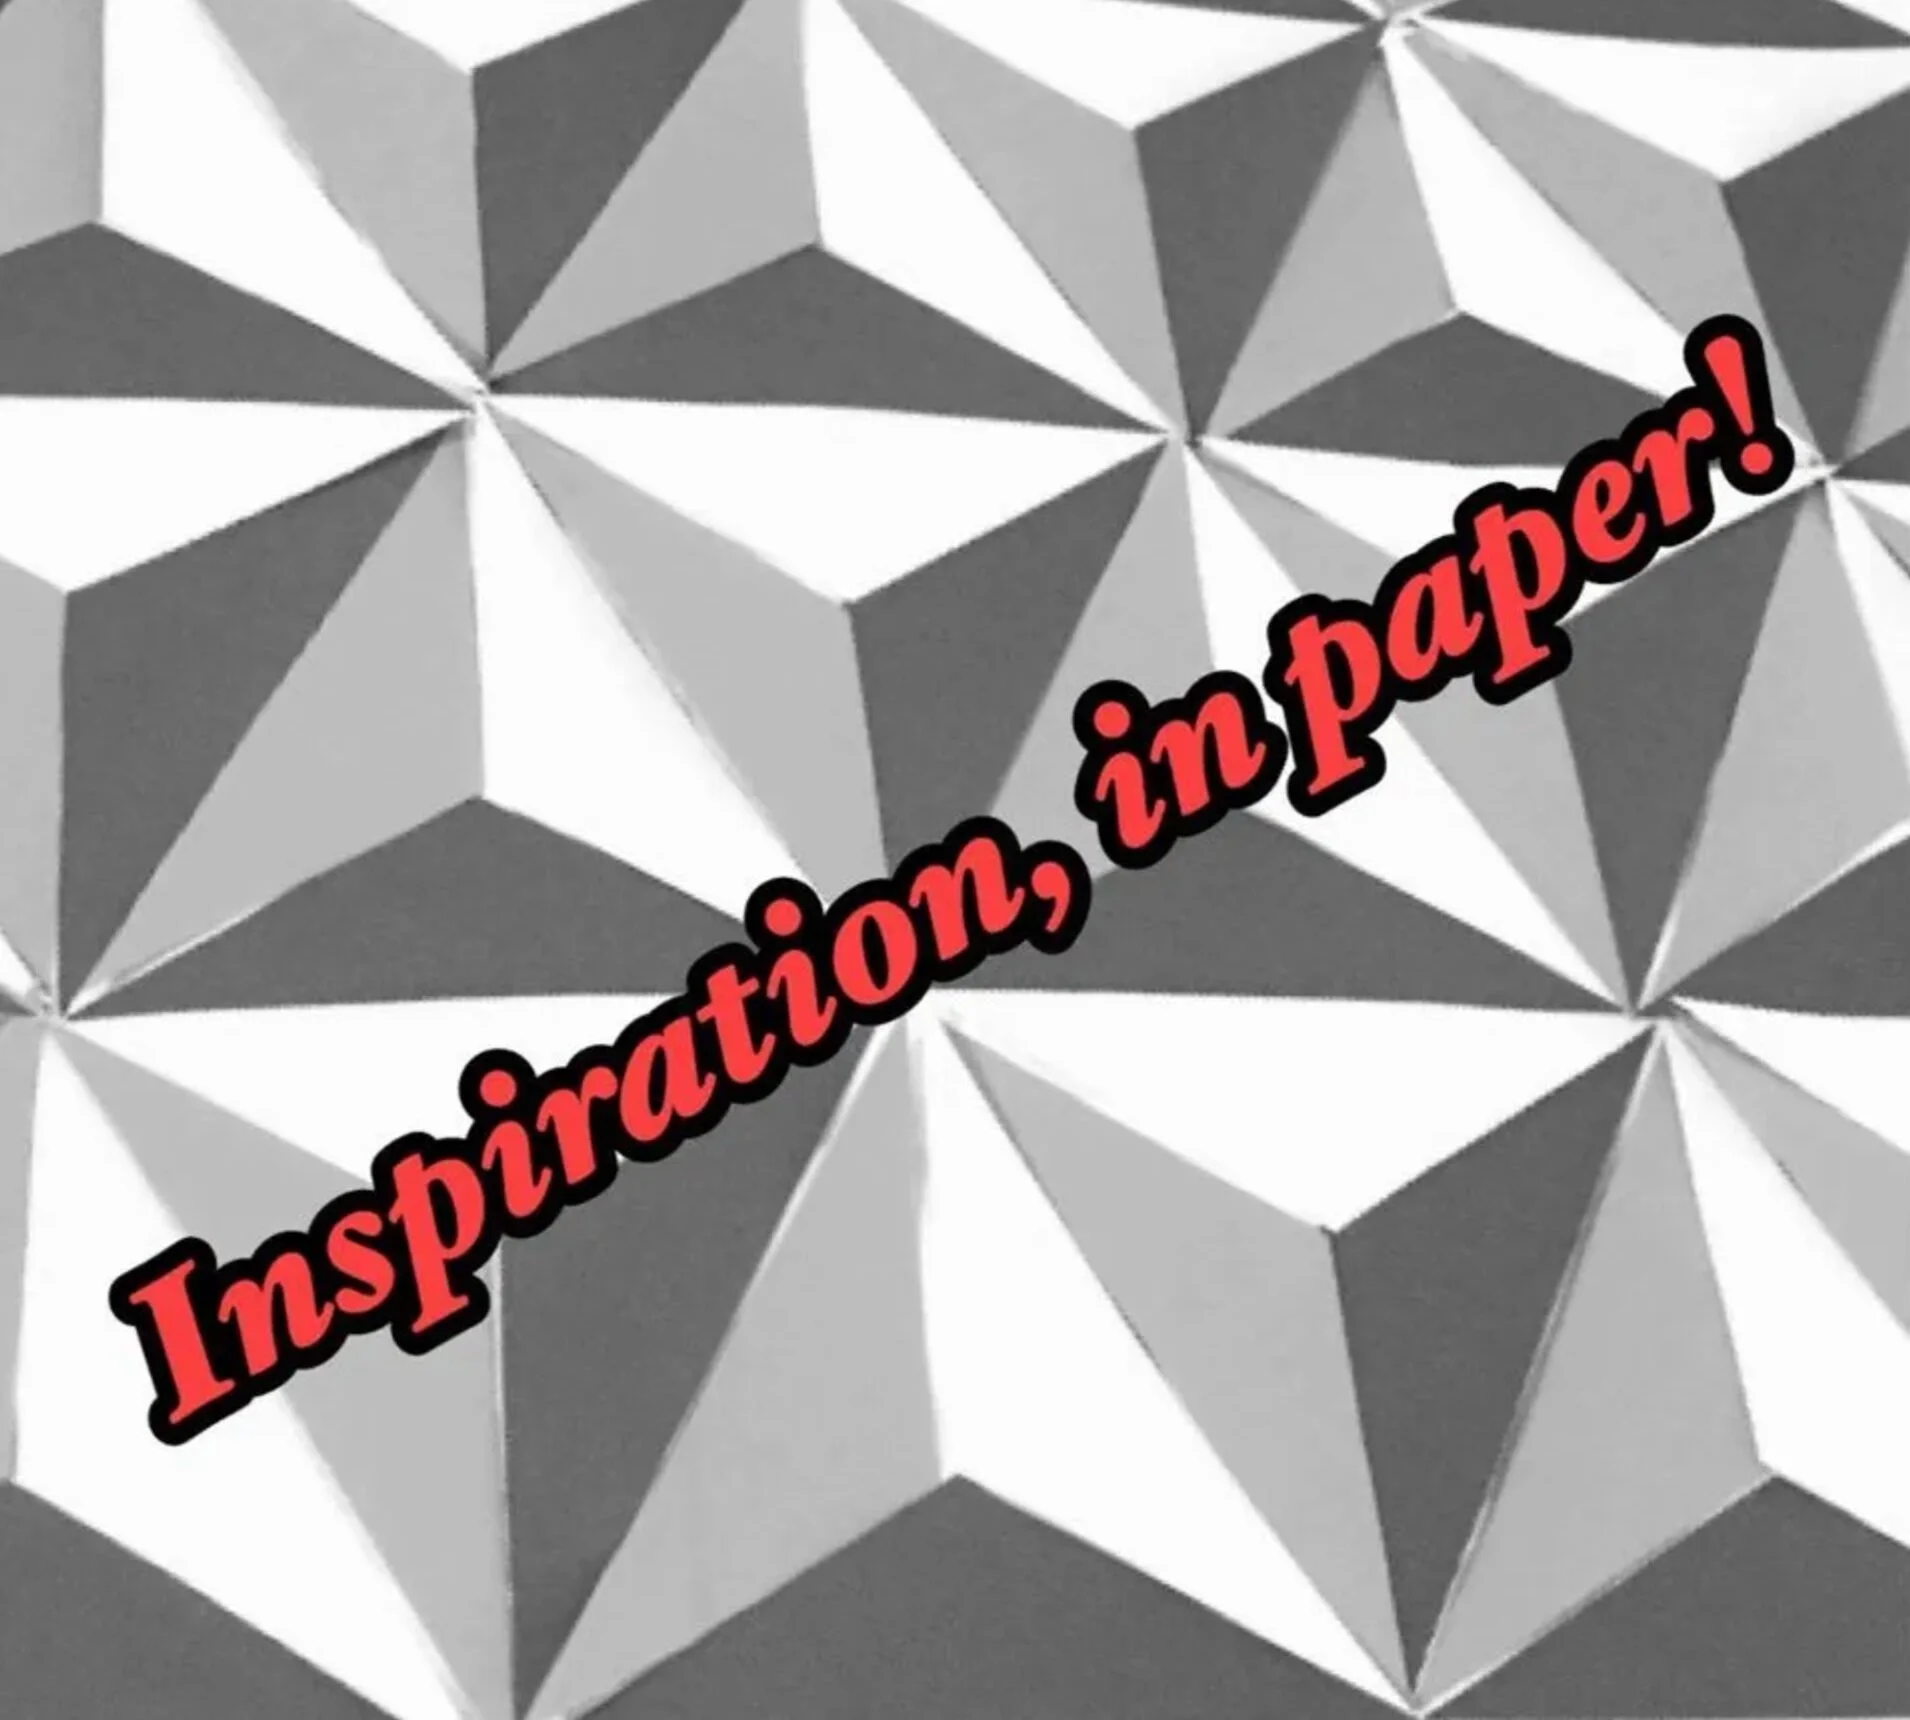
Decide how large you’d like your SE triangles! My wall was 9 ft tall and 12 ft wide. I didn’t want the pattern to be 100% “fit” to the wall, as in, I didn’t divide it out based on how big my wall is. I wanted a pattern that looked like wallpaper, so I wanted it to start “halfway” coming out like a continuous pattern. You can see in the final pic what I mean…I don’t have full triangles on the top or one side.
I decided on 18-inch triangles. So, the tallest part and widest part of each large piece would be 18 inches. I started at the floor, and measured up 18 inches with a yardstick, and put a dot (with a white colored pencil) every 18 inches horizontally as well. This way I knew the lines would be straight across bc I would have checkpoints all the way across the wall. After the marks are made, put the tape up! Note again, the top section isn’t going to be a full 18 inches like the others.
I purchased 1/4 inch (tiny!) wide painters tape from Amazon! I got 2 packs of 3 to make sure I’d have enough. I wanted the lines to be tiny because of how Spaceship Earth is in real life.
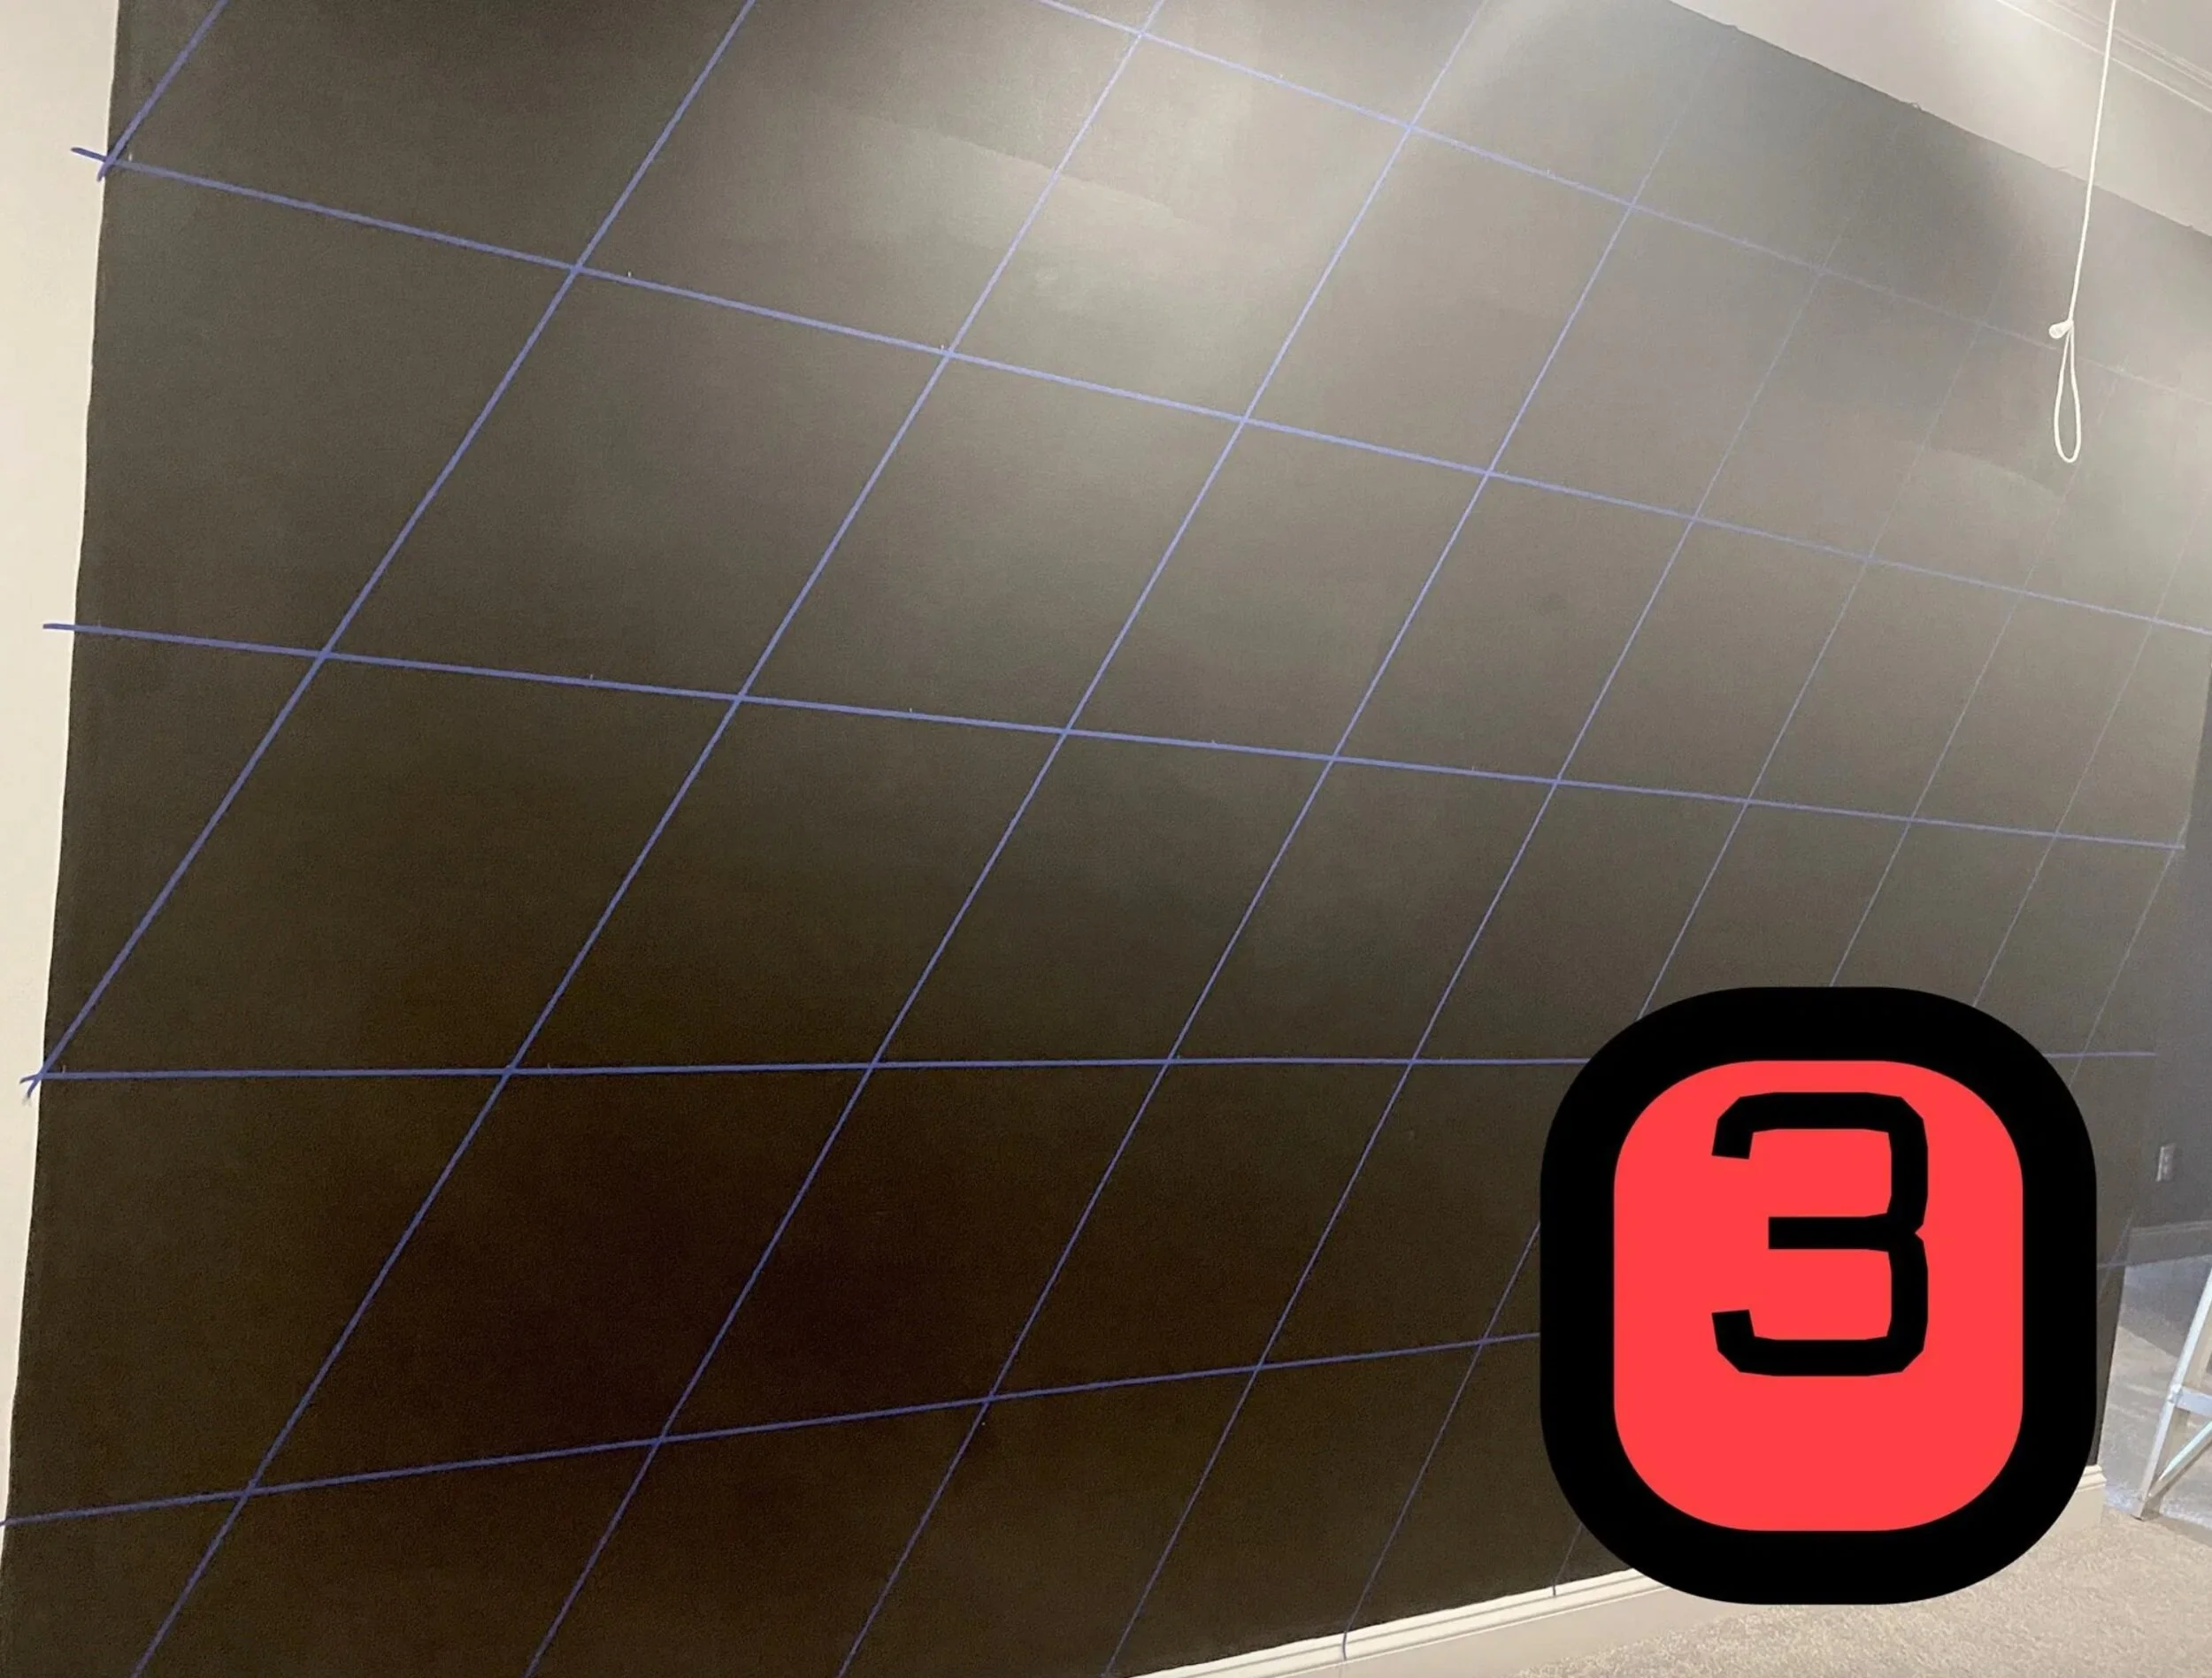
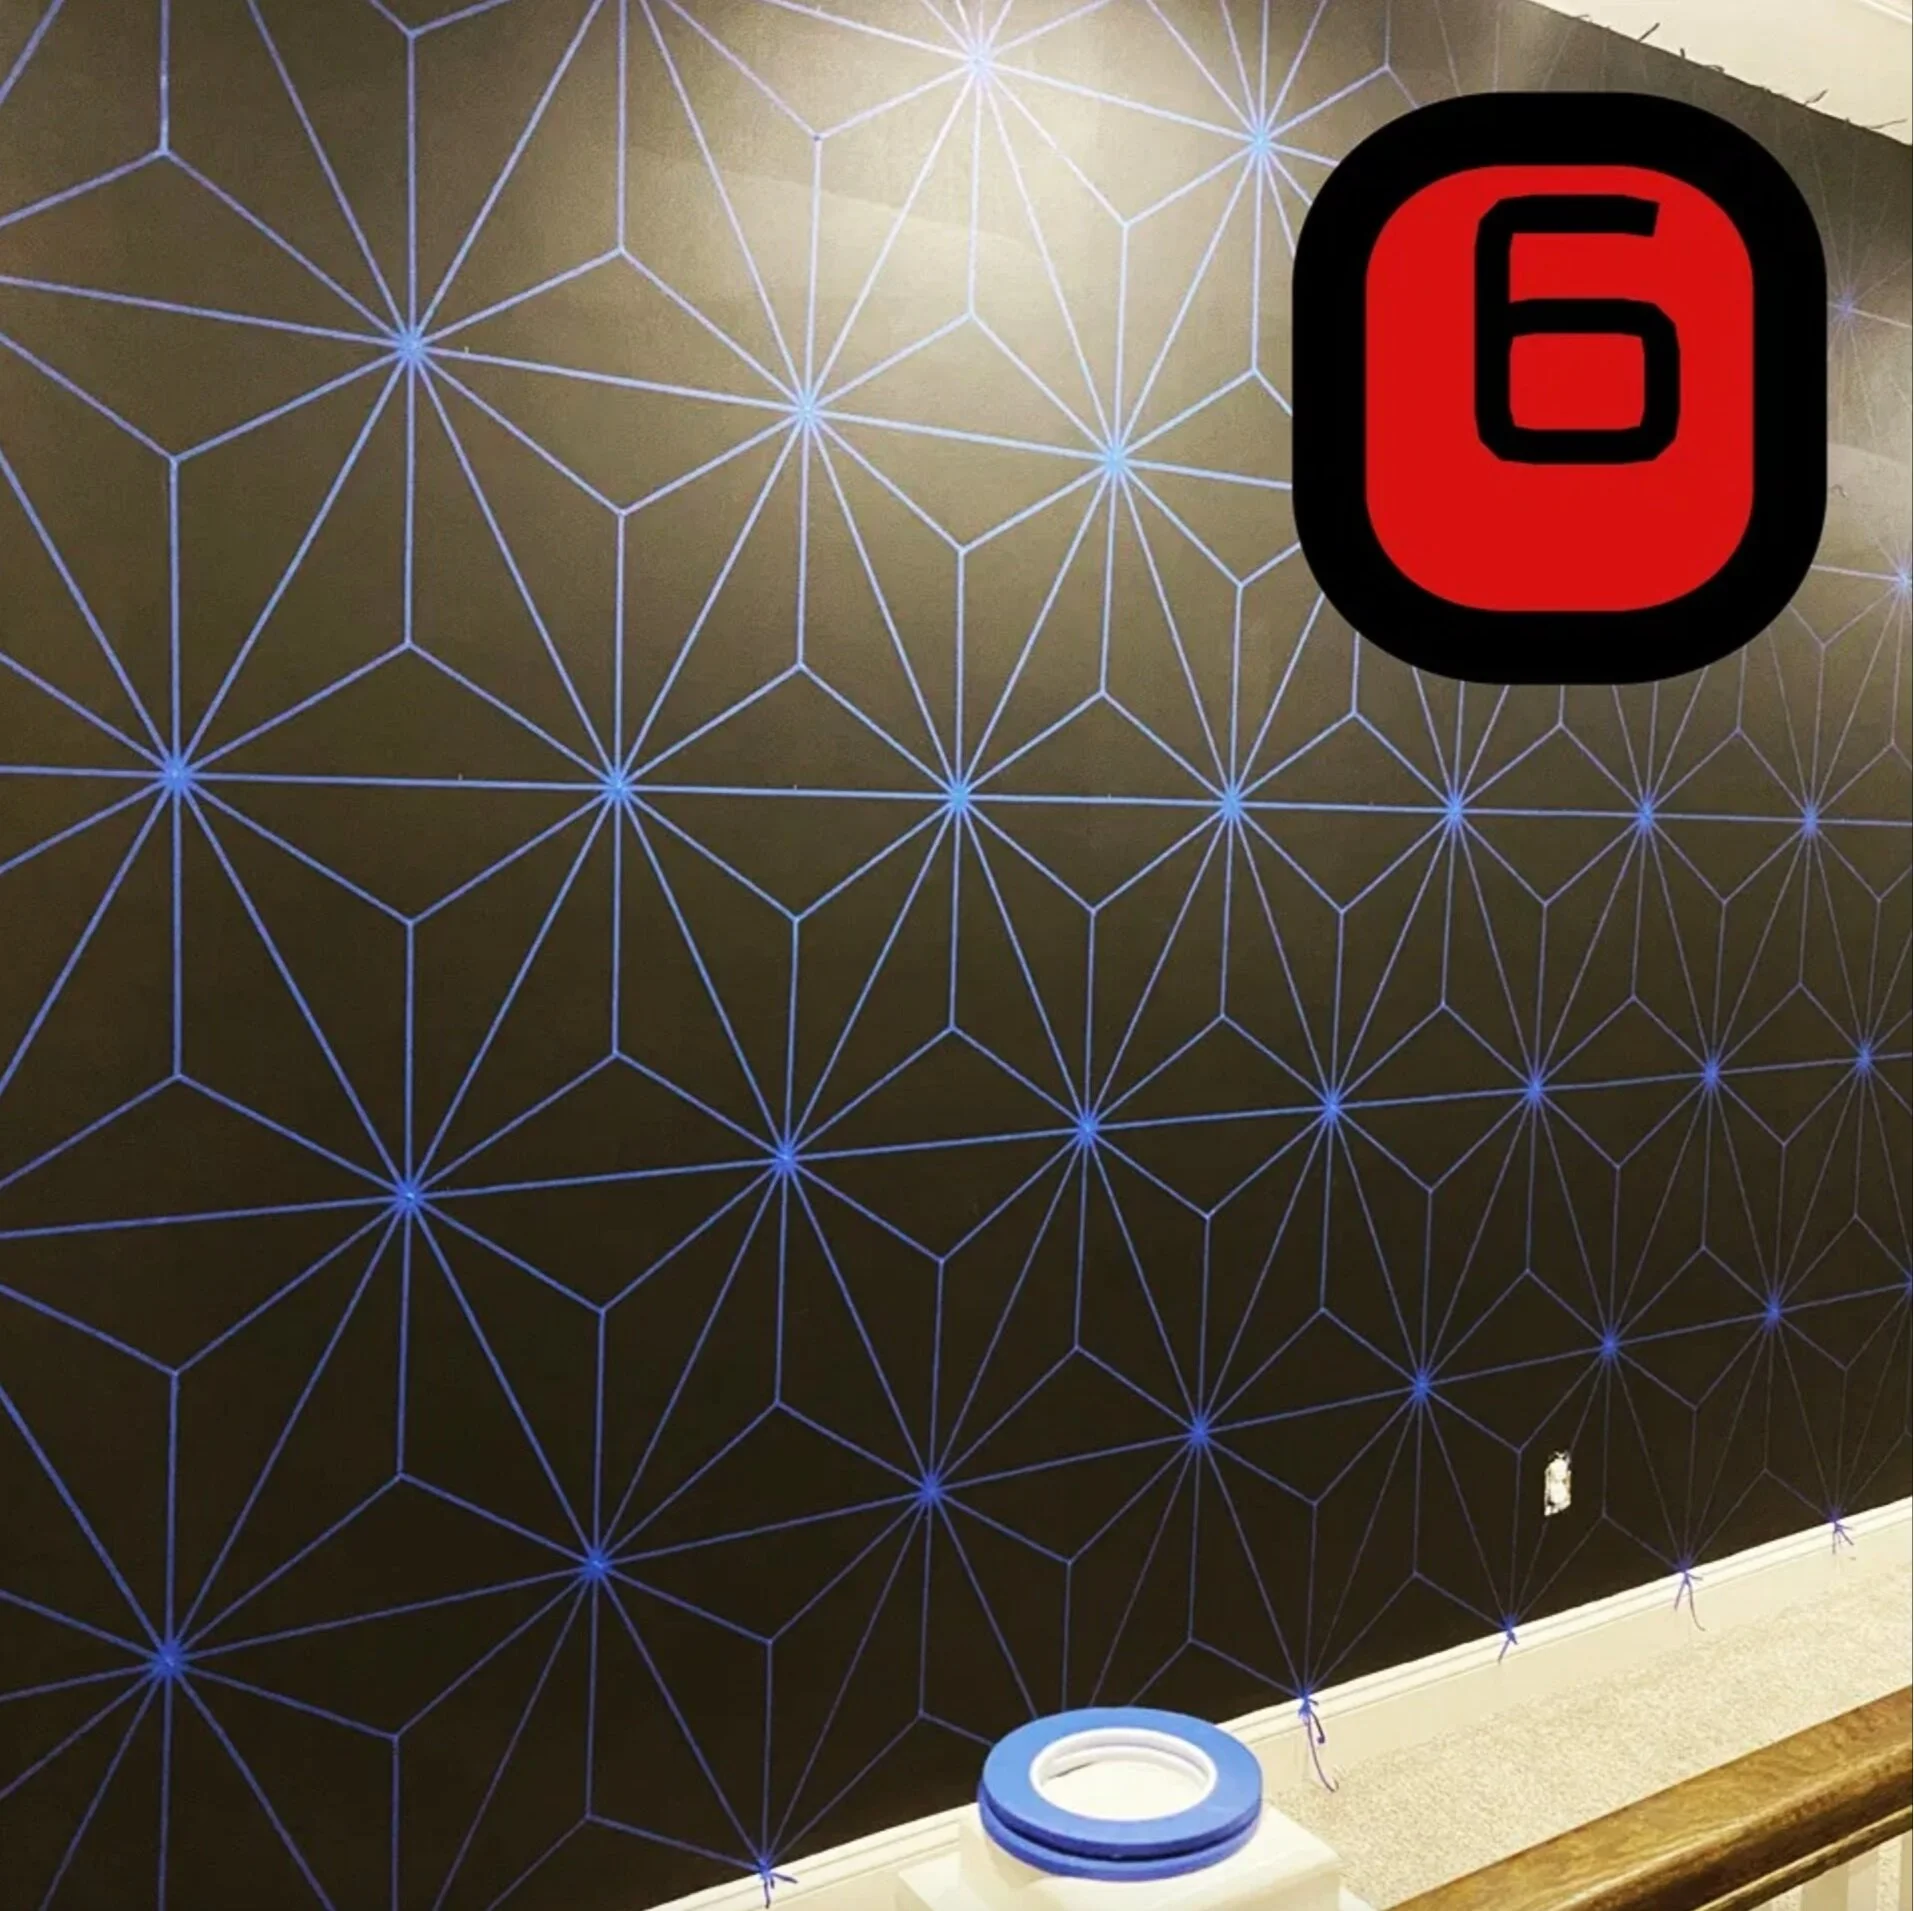
Step 3: diagonal lines
Step 3: Tape your diagonal lines!
Ok, next is taping the diagonal lines! Go along each taped line and measure 18 inches and put a dot. You already did this before, but you may have covered it with tape. From the side of the wall, measure 18 inches out and put dots, all across each line-BUT-every other lines, measure out 9 inches from side wall THEN continue 18 inches. This ensures you will have diamond shapes bc you are alternating your 18-inch spreads.
Tape the lines connecting dots making one side of the triangles.
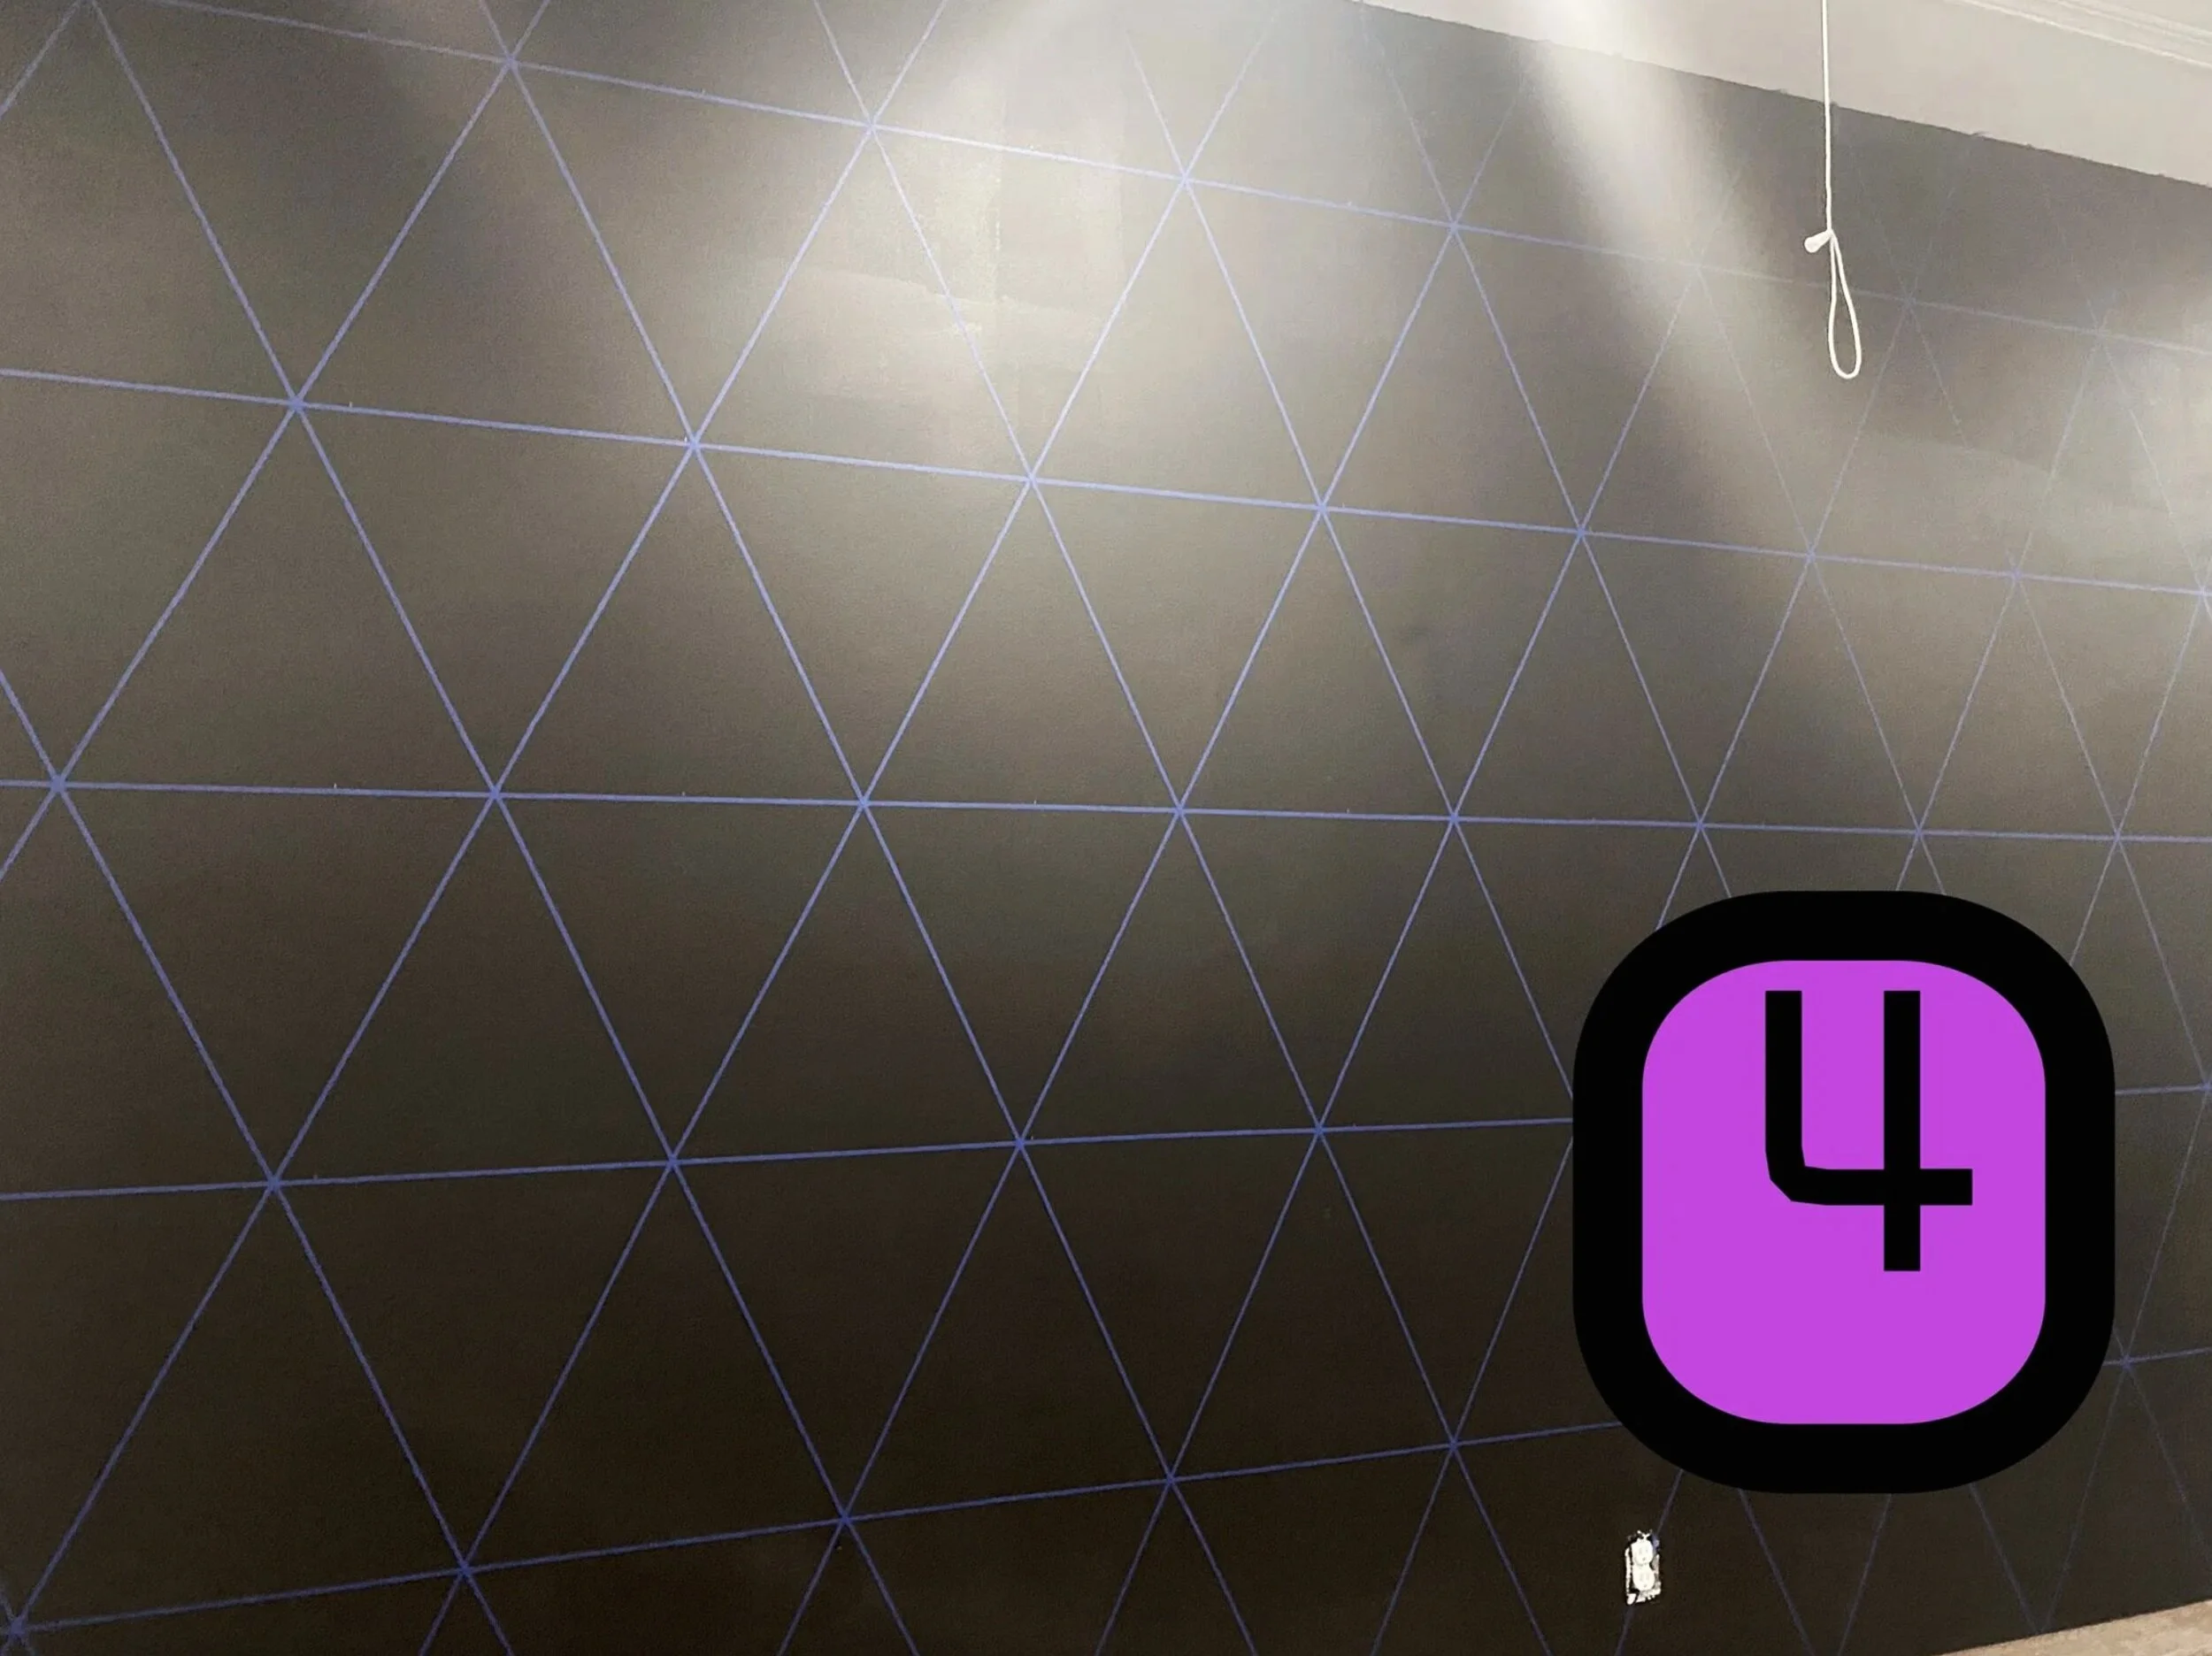
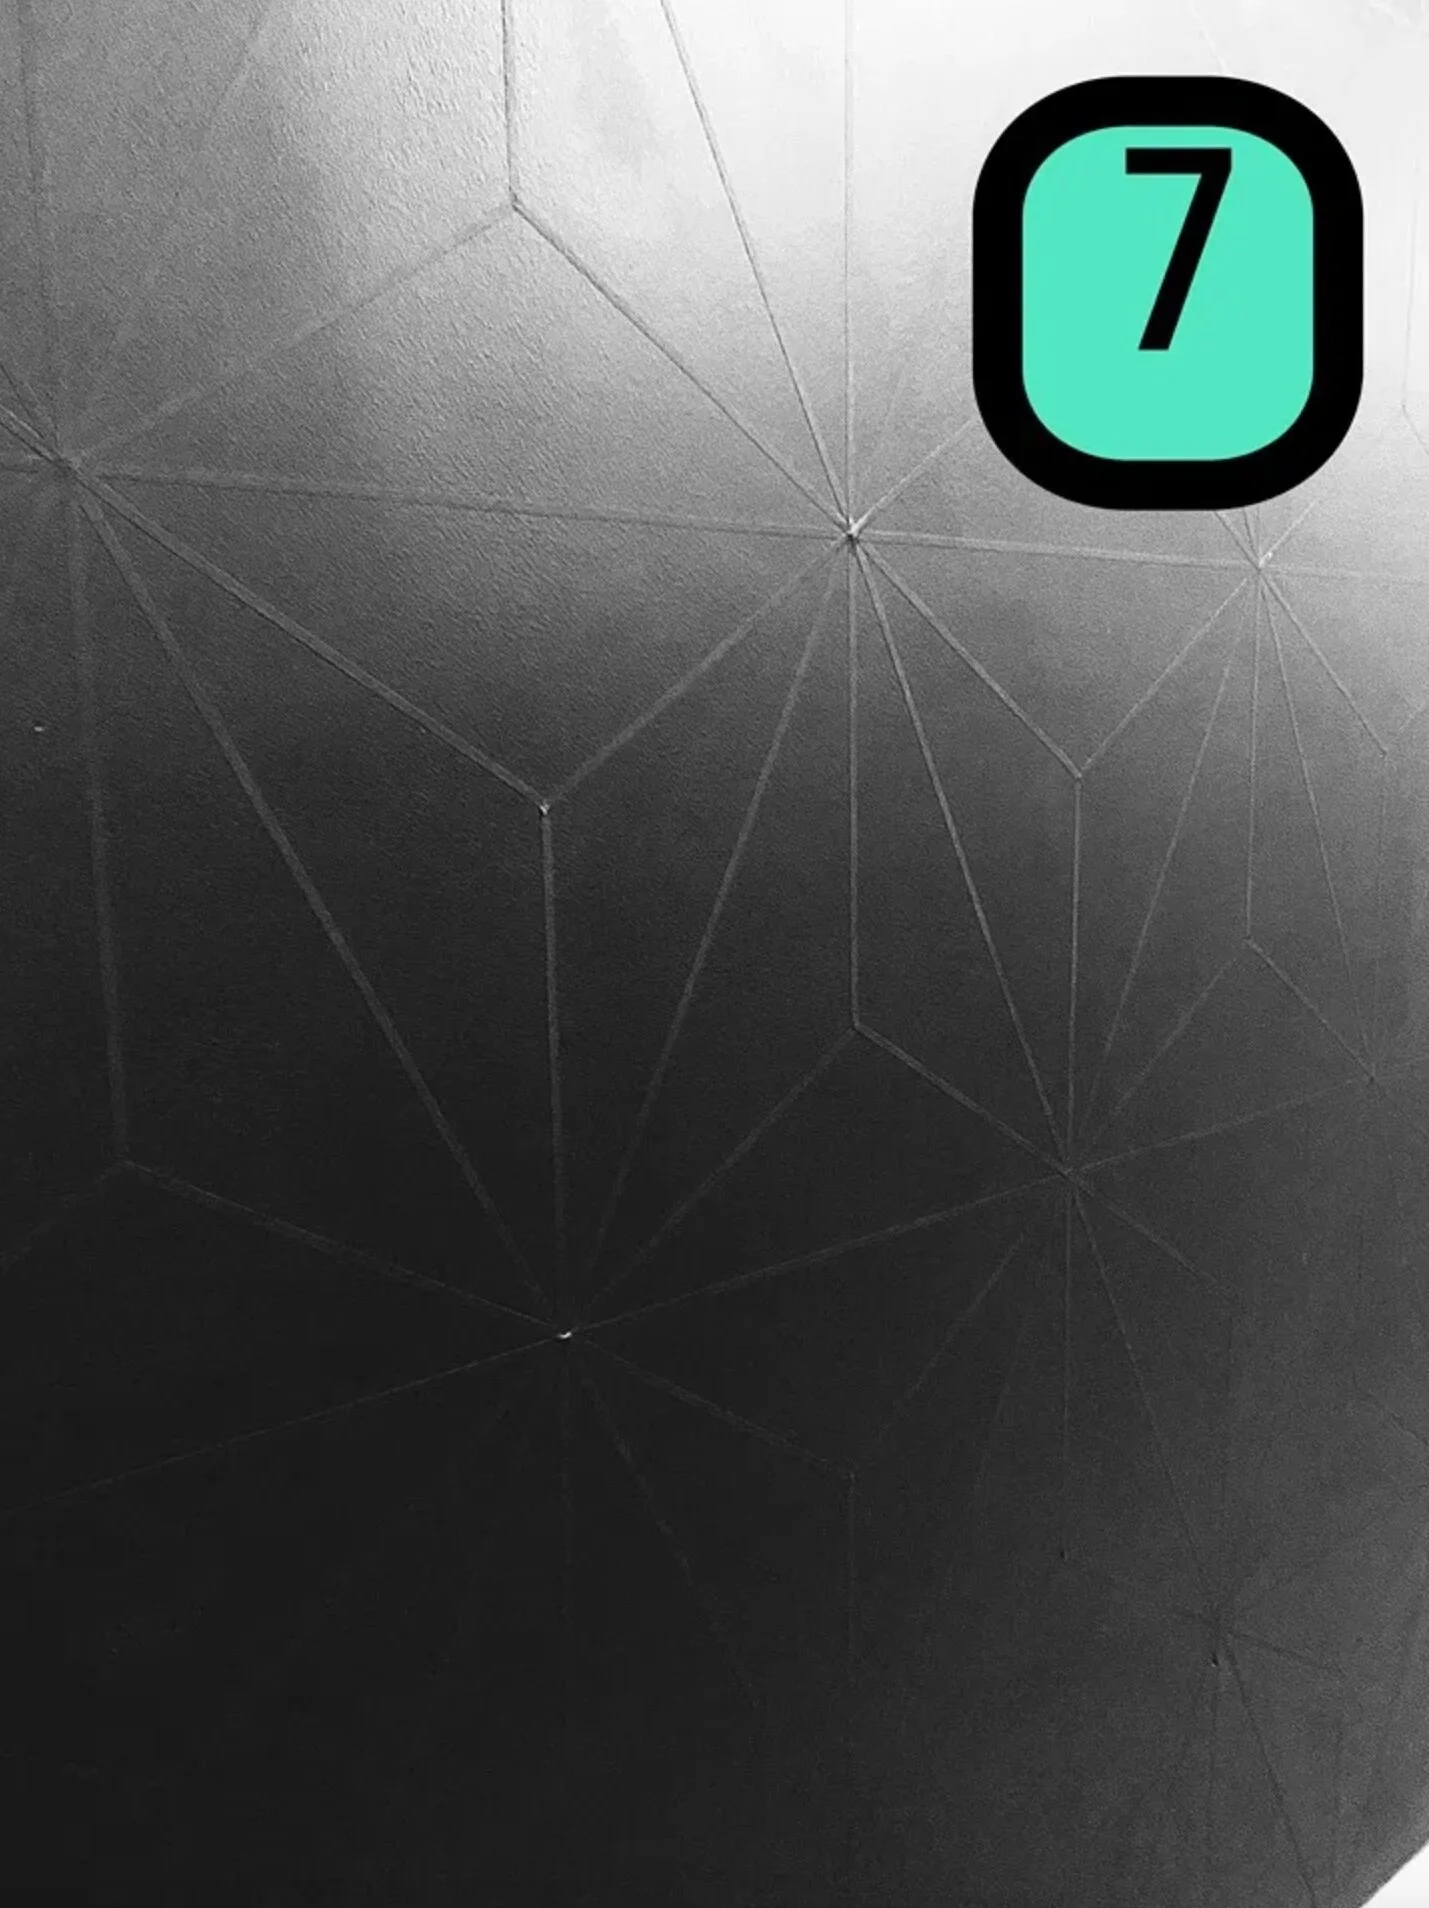
Step 4: triangles
Step 4: Complete those triangles!
You already have your dots! Now tape the other side of the triangles by connecting the dots again going the other direction. It’s easy! Now you have rows of symmetrical triangles- tada!
Step 5: trifecta of triangles
Step 5: Tape your triangle trifecta within each triangle!
Here comes the fun part . Now it’s time to tape off each triangle!
It’s actually much easier than it looks. You only have to measure once in each triangle. It isn’t perfect, but I figured measuring 12 inches from the tallest point of each triangle made each little triangle almost the exact same size. That means also measuring 12 inches from the bottom point of every other triangle-as in, the ones that are upside down! Look closely and you’ll see your pattern in triangles is: pointing up, pointing down. So, 12 inches from the top, 12 inches from the bottom. Simply put a dot at that point. Then, bring your 3 tapes from the center dot to each triangle angle!
Step 6: keep going
Step 6: Keep going until you complete each triangle!
Whew! This is actually easier than the painting part…believe it or not.
Step 7: paint black
Step 7: Paint with black!
Using a large paint roller, paint over the entire wall again with the same black paint as your base. This helps prevent grey bleeding under the tape when you go to add your greys!
Step 8: lightest grey
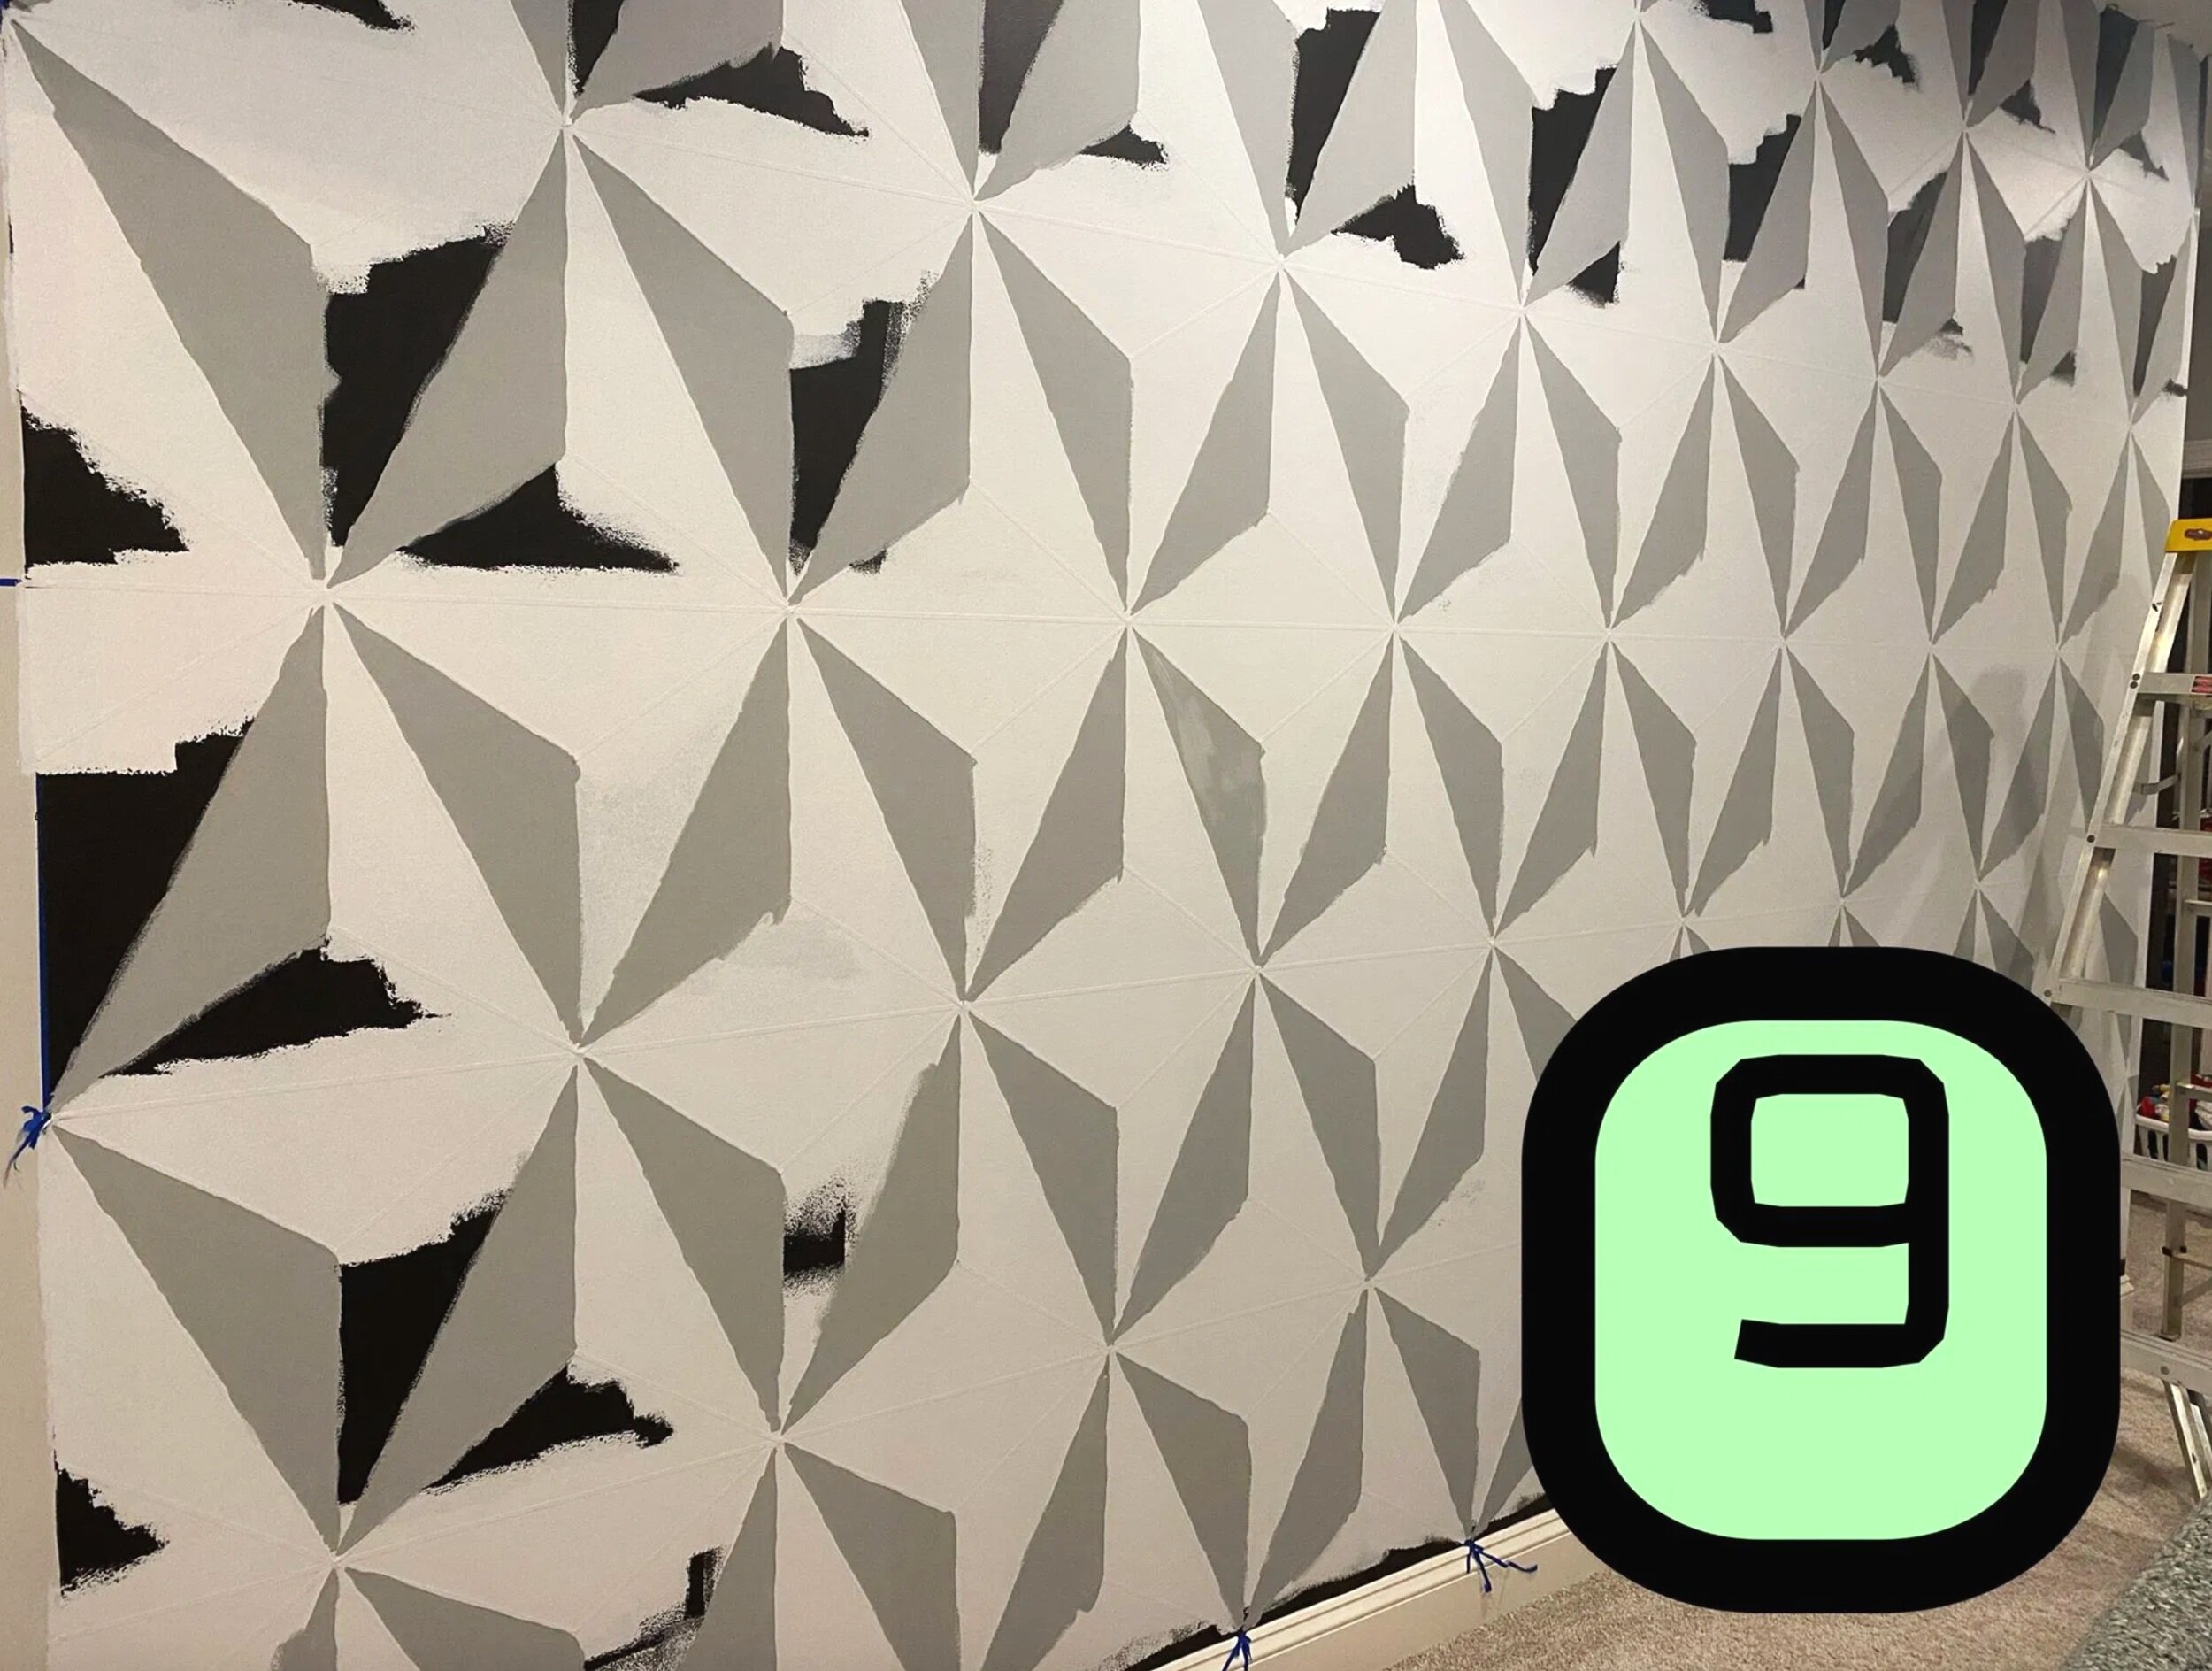
Step 8: Paint your lightest grey!
Now, time for the first color! Look at a pic of Spaceship Earth to decide where you’d like your colors to be. I used 3, so 2 different triangles per color. Also, I used a small artist’s paintbrush, like you’d use when painting a canvas…pointed/angled, about an inch wide. You have to watch those tiny corners, so I liked an angled brush.
With the first color, You can be VERY free with this one…because you’re going to be painting all the other ones next. I actually used a small roller for this one to save time. Don’t worry about staying in the lines!
Step 9: medium grey
Step 9: Paint your medium grey!
Second color! You can still paint it a bit freely here because you still have one color to go. Just make sure not to get it in the triangles of your first color!
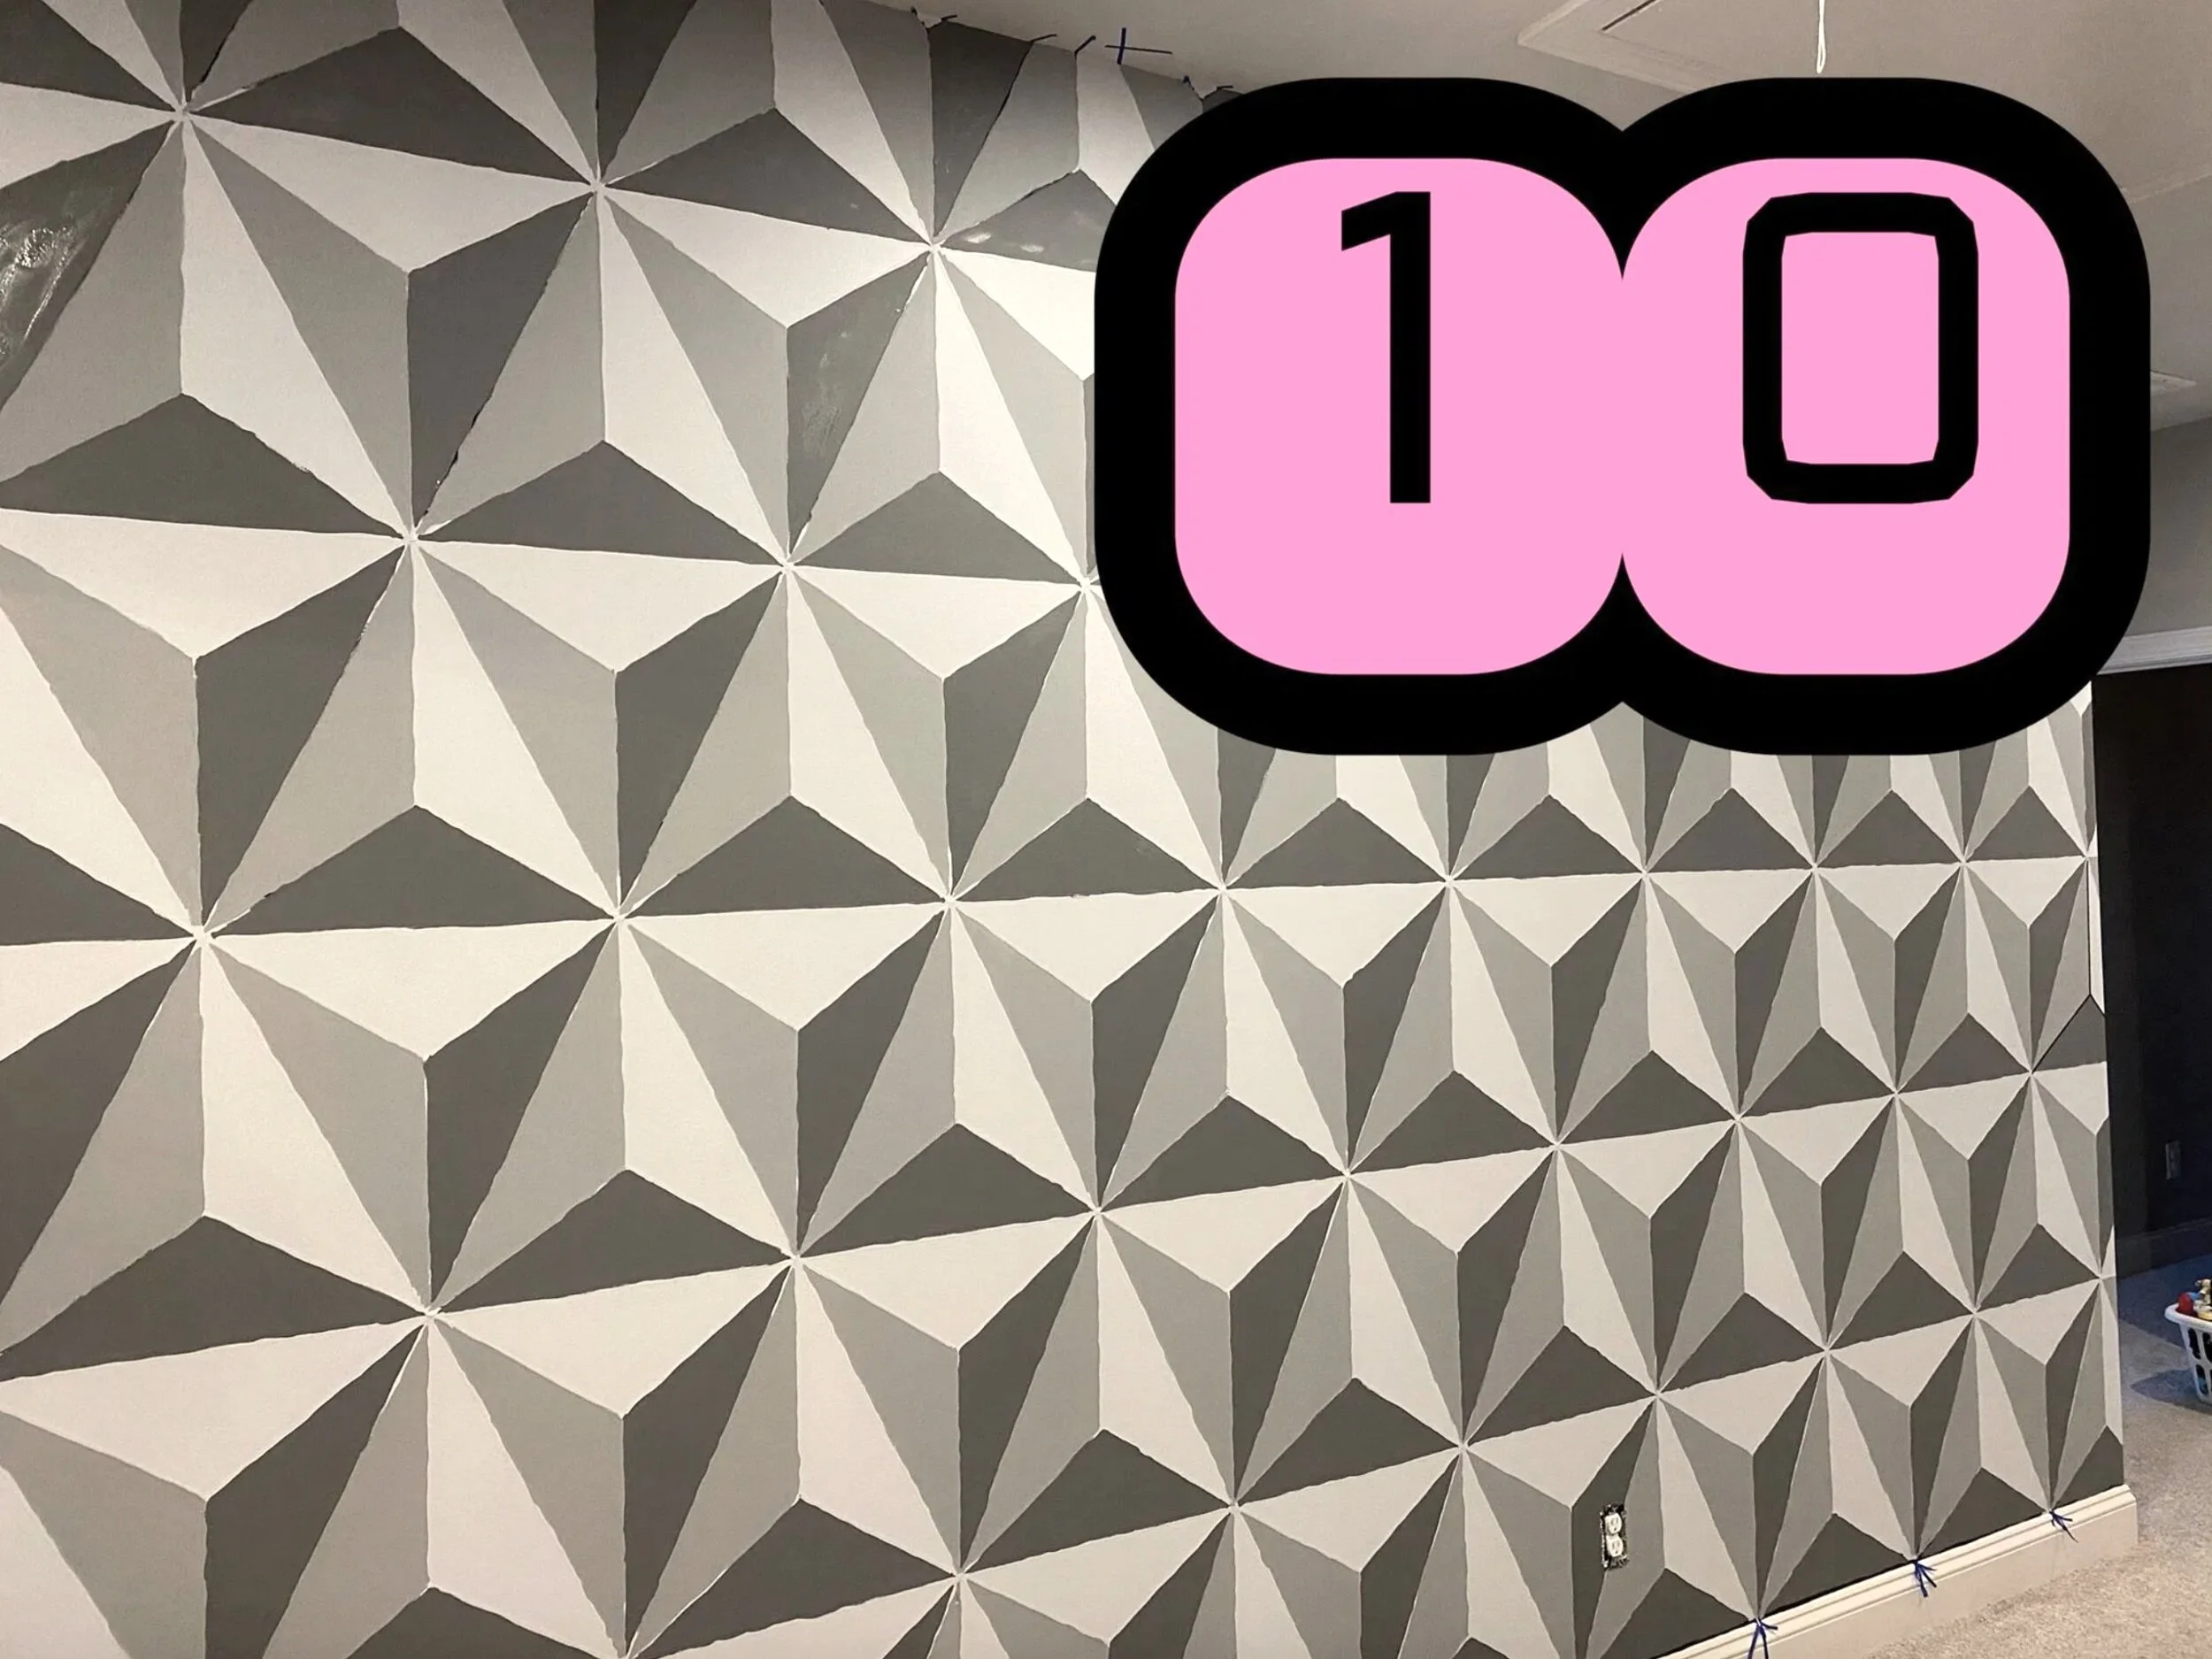
Step 10: darkest grey
Step 10: Paint your last grey!
Last color! Be very very careful and have wipes handy-that tape is SO thin. Don’t get it into any other section! Wipe immediately if you do-I used baby wipes. You can always touch up colors later too.
I had to do 2 coats on almost all of my triangles as well.
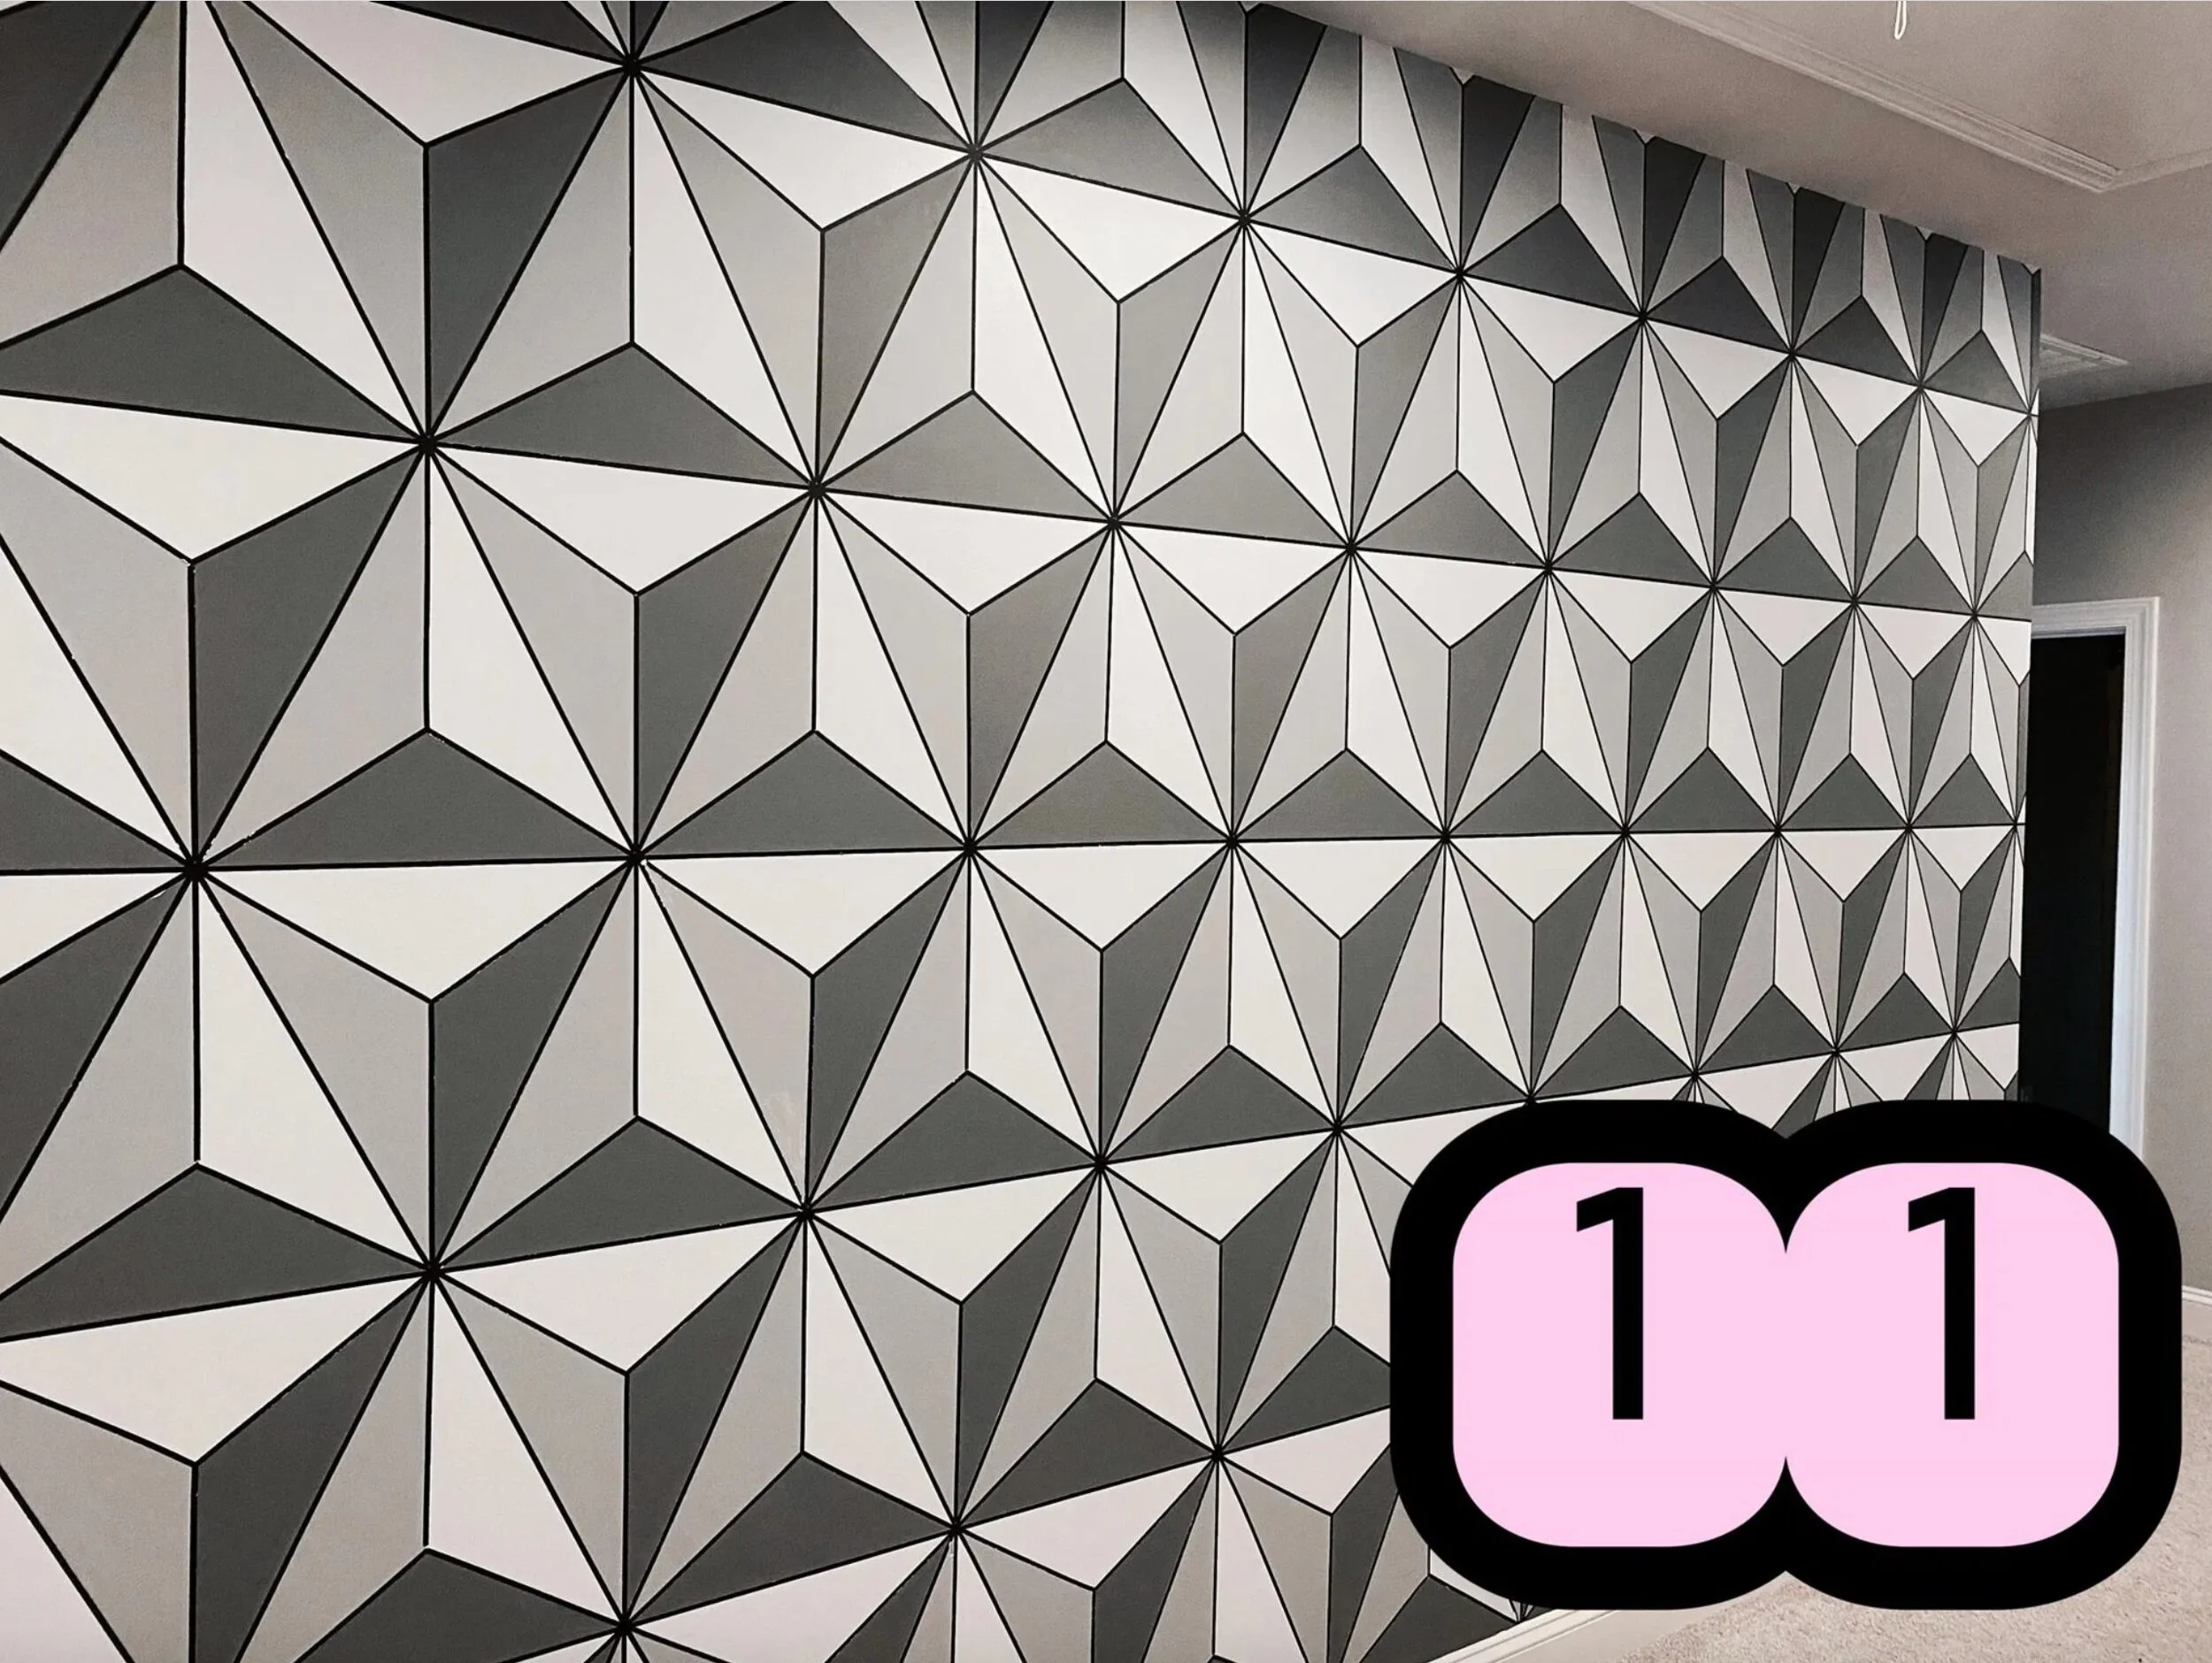
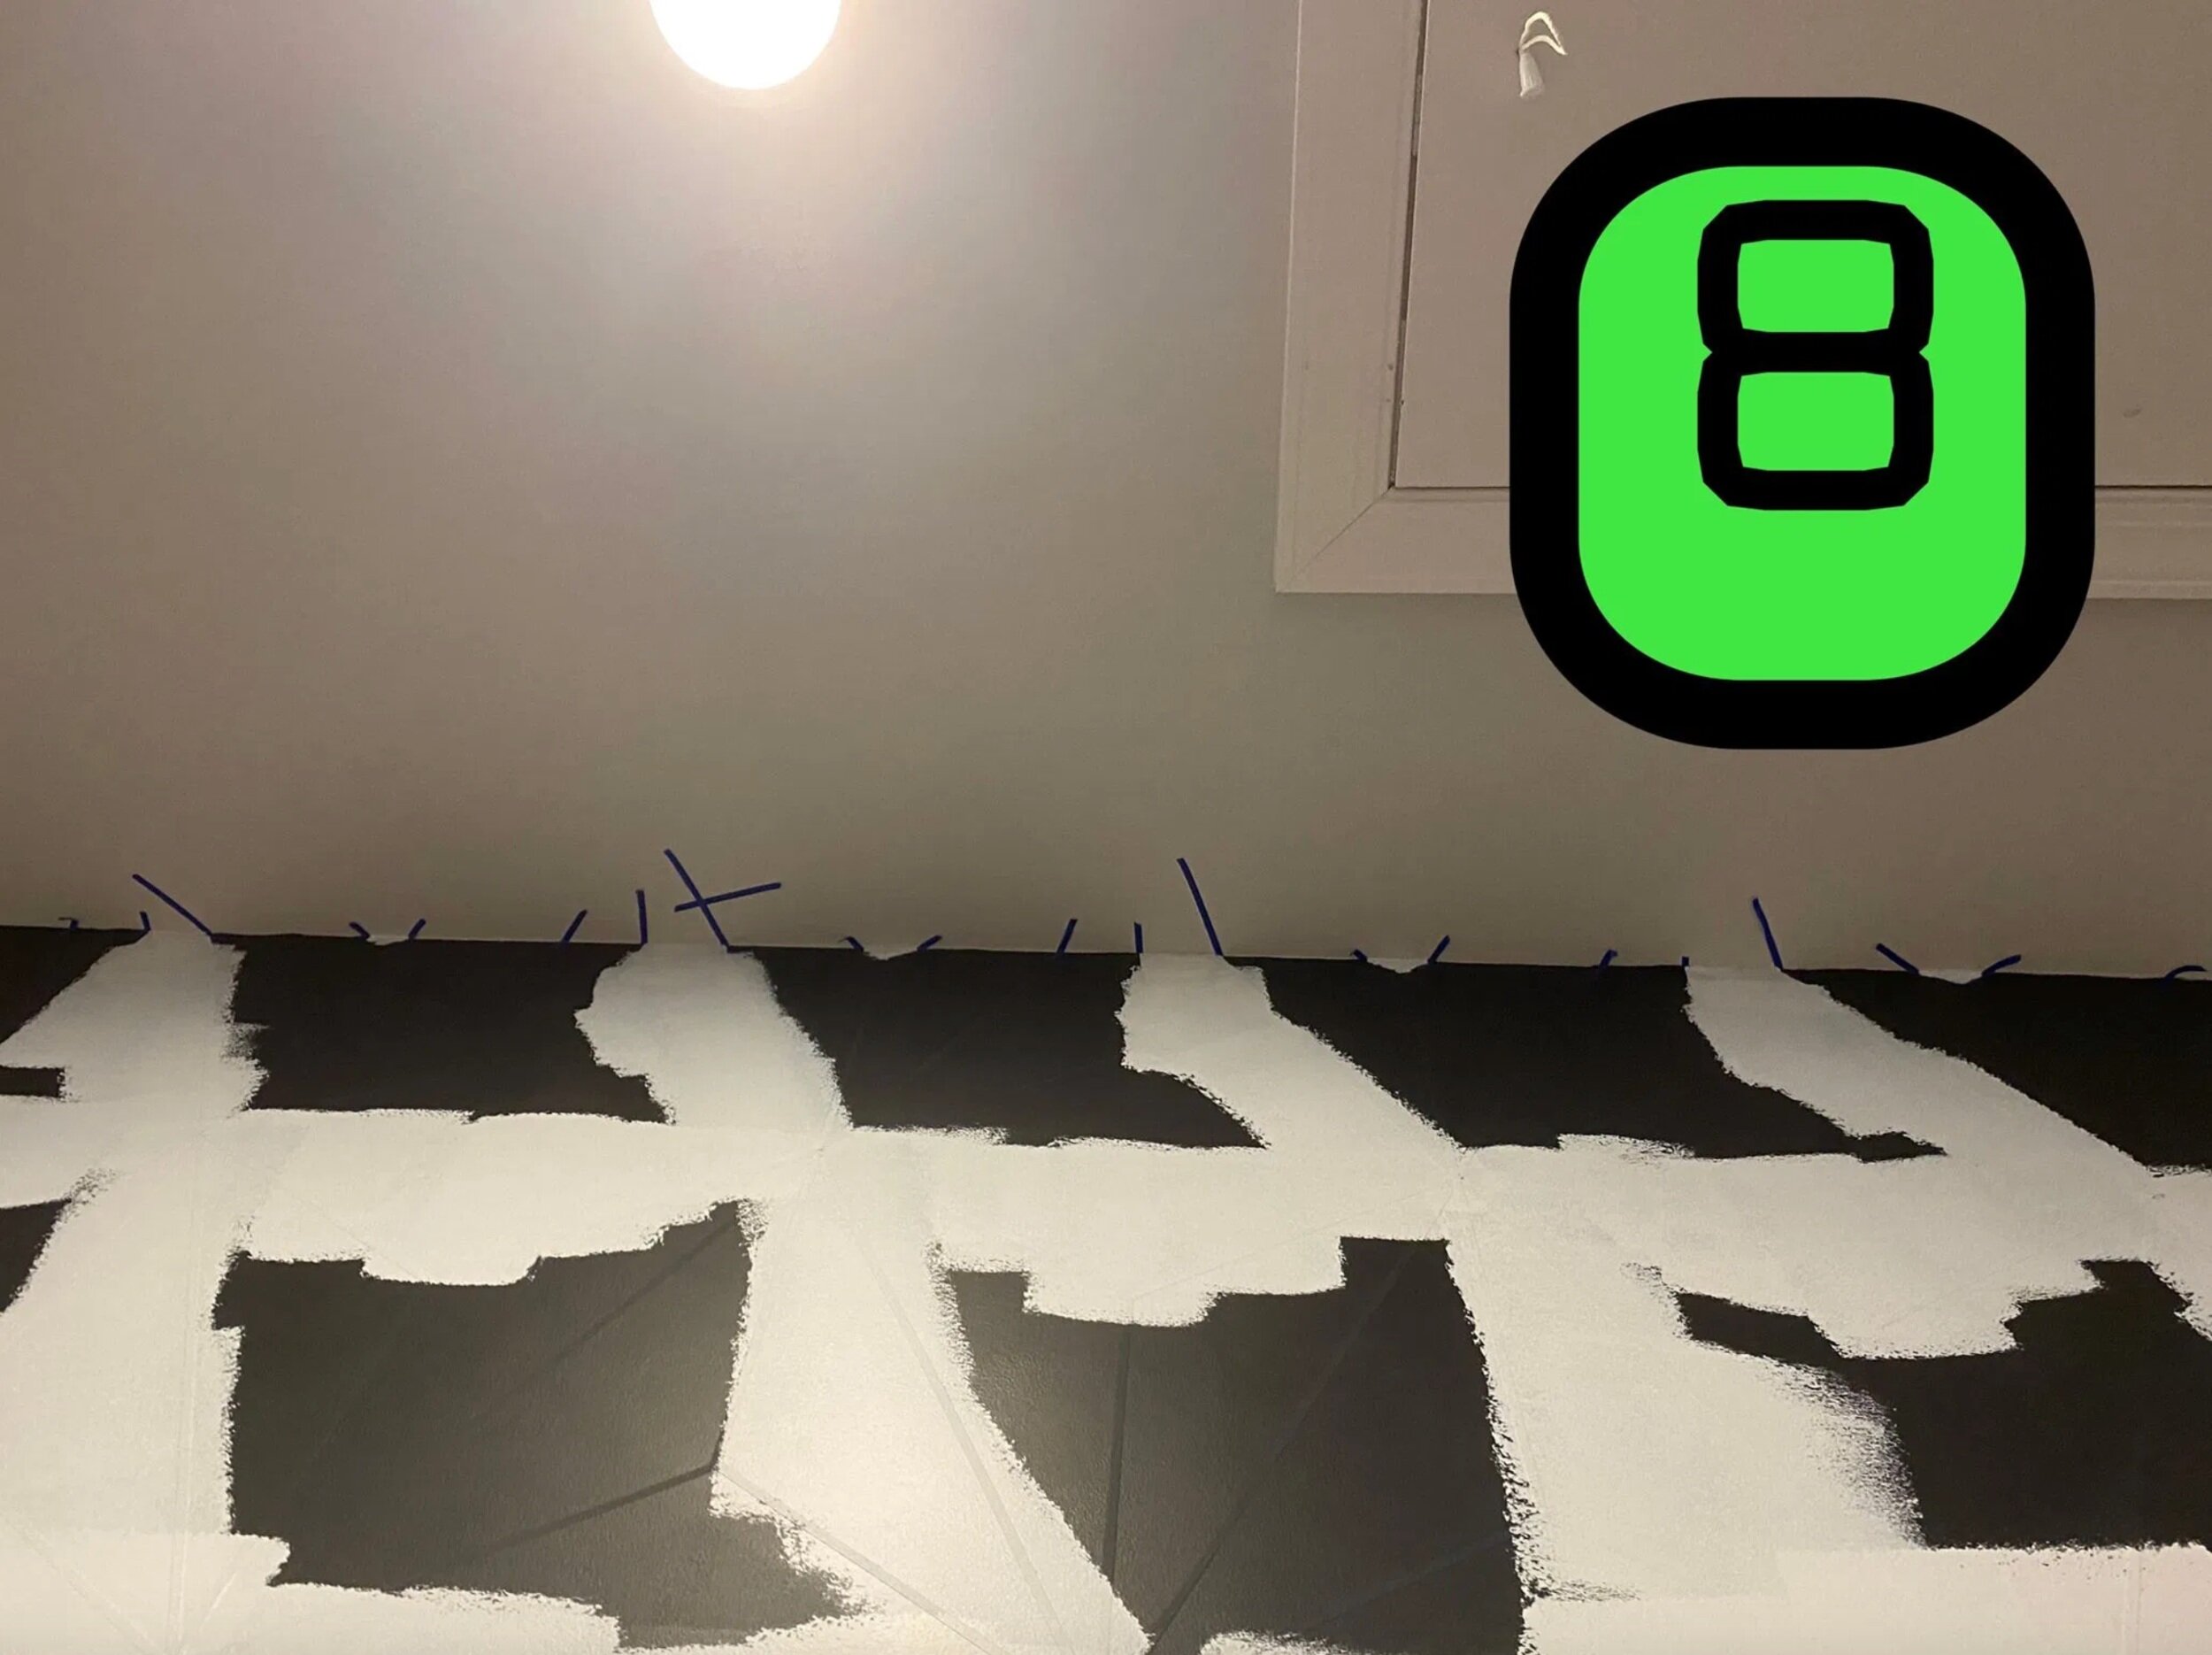
Step 11: pulling tape
Step 11: Carefully pull off your tape
Remove tape! I did a small time-lapse video of this as well, just to show. Advice-don’t pull a bunch of directions at once, even though it’s tempting. Do one piece at a time to avoid pulling off drywall.
Step 12: touch ups
Step 12: Time for touch ups!
Go back and touch up any colors that bled, and make sure to touch up the black where you put those tiny white colored-pencil dots! Small bits of dry-wall ended up coming off a bunch on ours, so we had a lot of black touch-ups to do. Make sure to use those tiny paint brushes!
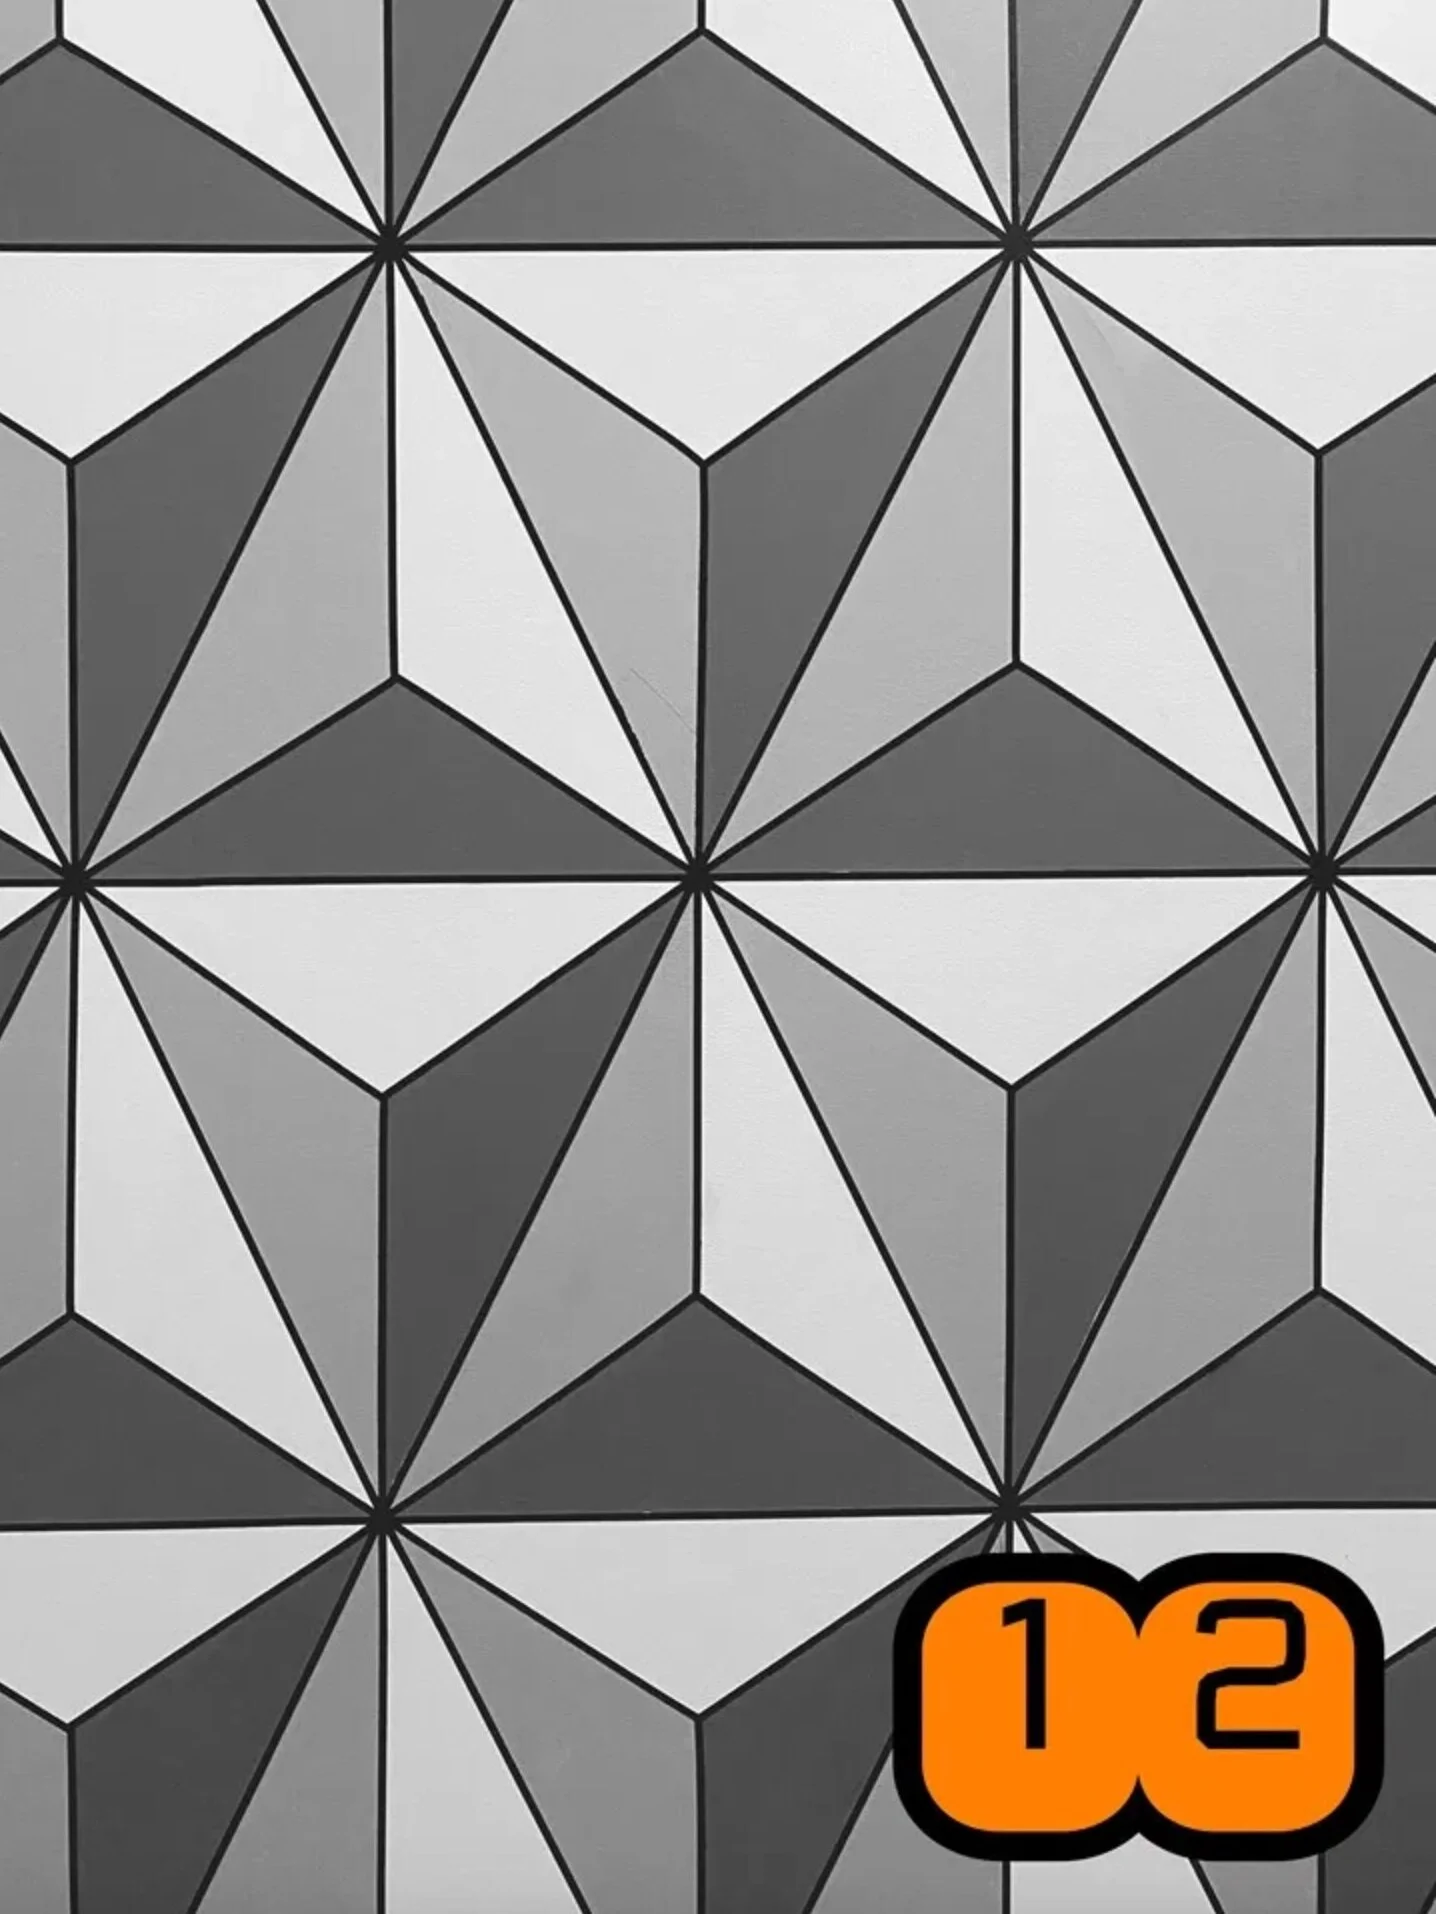
Also, here is a picture of the colorway I wanted to go with! This helped me know where I wanted to put each of my 3 colors.
Wendy Johnson La, a facebook friend, cut these for her wall and was nice enough to turn them greyscale for me and message me when I was trying to decide what colors I wanted! It helped me figure out where I wanted to put the lightest grey, medium grey, and darkest grey because I liked how this looked.

Completed project!
Voila! Your project is complete! It took us several days (and lots of Disney Parks music) to complete this. So if it takes you a while, never fear…that’s ok!
I hope these steps, photos, and product links were helpful and you can try this yourself! It really is so much fun to have a bit of our favorite park right here with us at home.
For information about the gallery wall adjacent, please check out my previous post, where I list out all the artwork and where you can find it!
Here is a link to a video tour of the space on my Instagram!