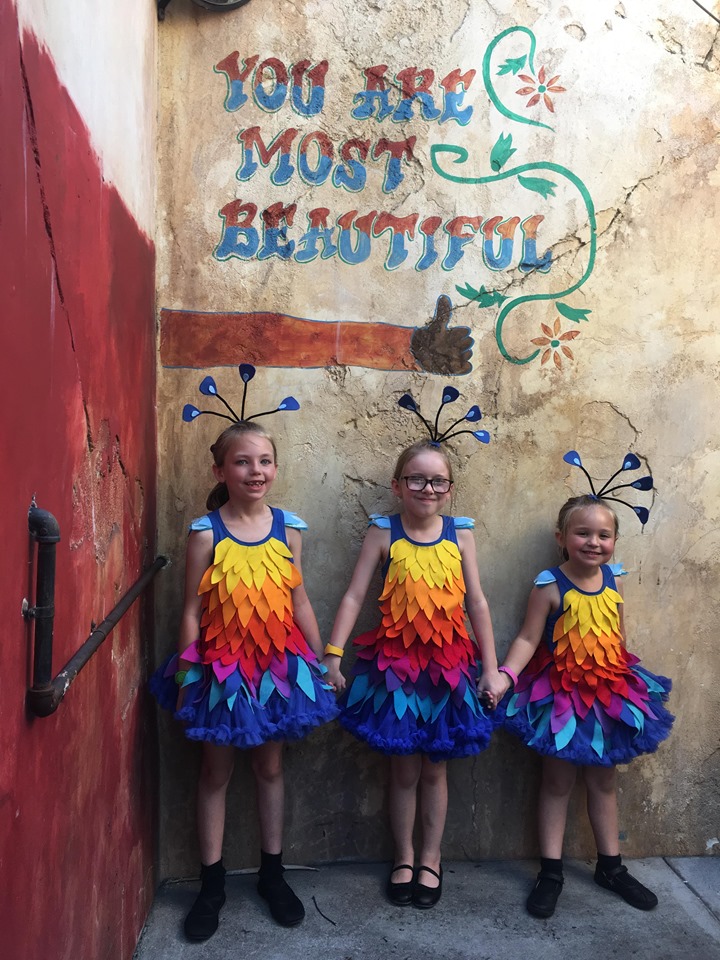
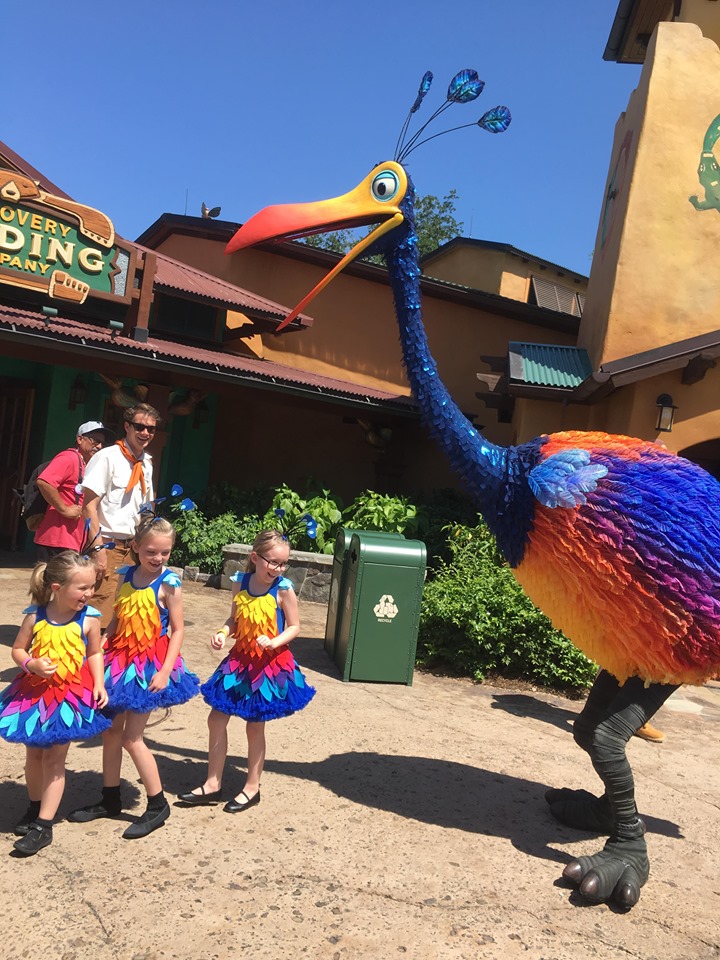
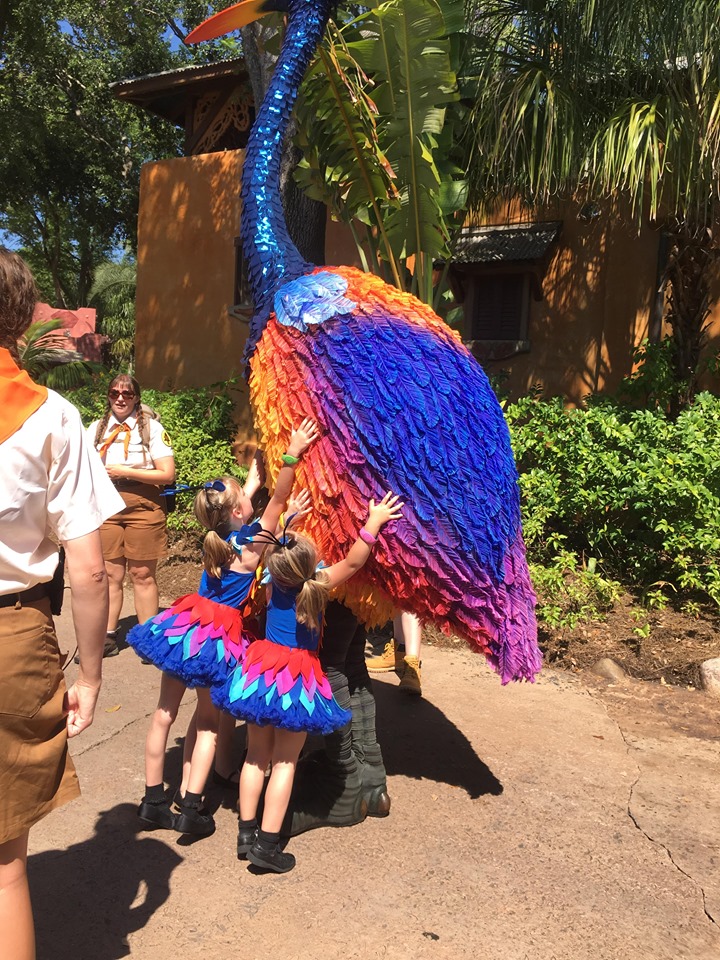
Kevin's Babies

All the way from Paradise Falls! Kevin’s babies were spotted in Disney’s Animal Kingdom following their mommy around and hoping for some treats…

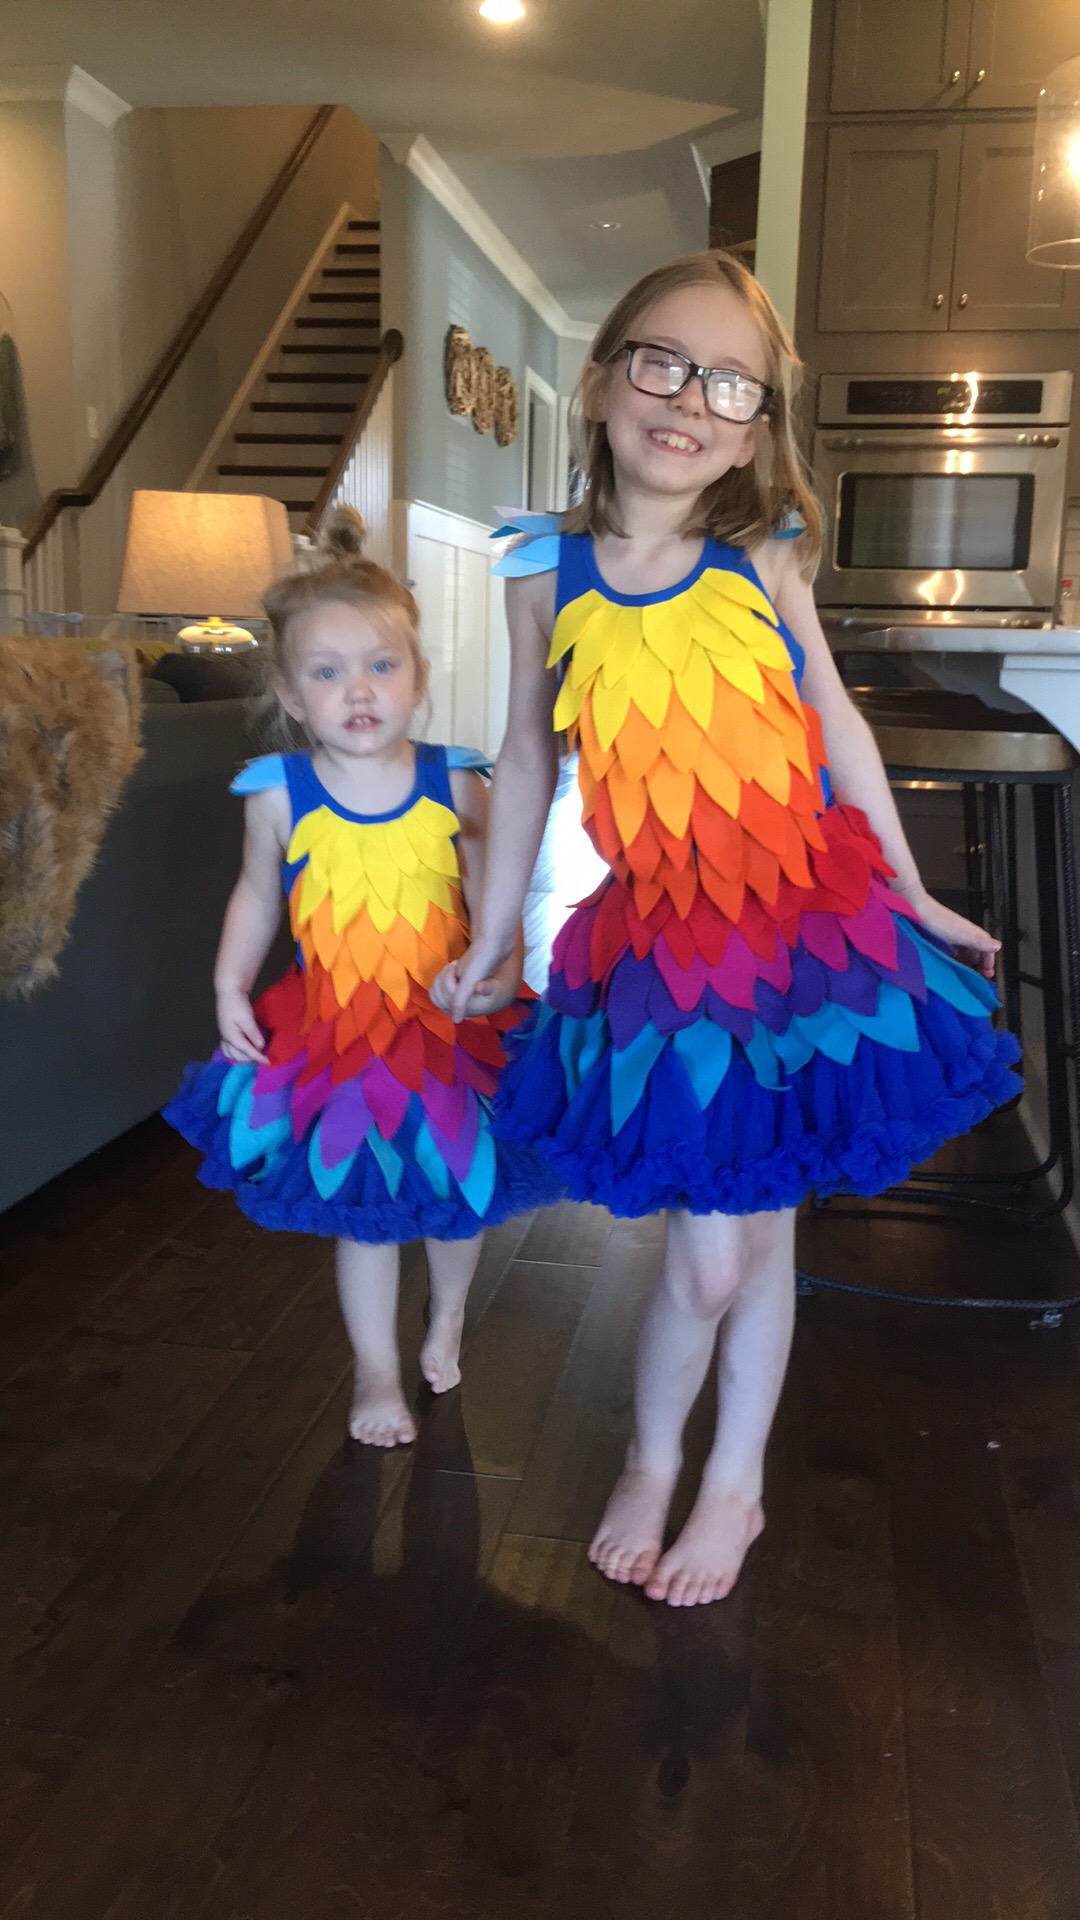
One of my most favorite hobbies is creating easy no-sew costumes for our trips that are wearable and comfy and full of magic! Today, I’ll show you how I made these easy peasy Kevin’s Babies costumes so you can make them, too! Why buy when you can make your own magic?

We had an absolute BLAST following Kevin around and making magic for her and her Wilderness Explorer pals last week at Disney’s Animal Kingdom on Discovery Island! That’s where you’ll find Kevin wandering and looking for chocolate most days. As you enter the park, don’t forget on the right-hand side just before the Tree of Life is where you pick up your Wilderness Explorer handbooks for badge hunting fun! More on that activity later (it’s so fun for littles!)
Today we are focusing on these easy DIY Kevin’s Babies costumes!
Here’s what you’ll need:
*Royal blue tank: Amazon
*Royal blue tutu skirt: Amazon
*4 pieces of felt in each of the following colors: yellow, yellow-orange, orange, red, fushia, purple, teal, royal blue. I chose Hobby Lobby as my local craft store for purchasing the felt this time. JoAnn is also great!
*Black pipe cleaners
*High-heat hot glue gun and glue sticks (I love Gorilla Glue glue sticks bc they are SUPER strong!)
*Bobby Pins
Total spent is about $35 because I already had some of the supplies
Step 1…the feathers!
For the sake of not being too complicated, I will tell you that this is literally cutting feather shapes out of felt and hot glueing them to your tank and tutu :) I will give you some tips, though, to help make it as easy as possible!
Hot glue brand is important…choose Gorilla! It’s tried and true for me. We have worn over and over with no problems whatsoever using this brand.
Also, stack your felt 4 pieces deep and cut waaaaaaay less for this project! use GOOD craft scissors for sharp lines and easy stacking. For the top you’ll need about 15 of each color, and for the skirt you’ll need about 20-25 of each color to be safe. I recommend stacking 4 pieces of each color and cutting 6 times to get 24 feathers!

stack that felt before you cut!
Cut the same shape for each layer of feathers. Make sure to cut a slightly smaller size for the top, increasing size as you go down each layer. Save the biggest feathers for the bottom teal layer.

Stacks of feathers ready to go

Once you have all your feathers cut and laid out by color (for easiest application) you’ll be ready to glue! Plug your glue gun up at the beginning of your project so it can be nice and scalding hot when you’re ready to use it :)
start at the very top of the tank and very top of skirt when gluing, moving DOWN the garment, once color at a time. Once finished with a color (do two rows per color for the top and one row per color for the skirt!) just lift your last layer feather-by-feather and glue the next layer about an inch down from there.

starting the next layer on skirt once first is done
IMPORTANT PIECE OF ADVICE when gluing the top layer of feathers on your skirt: make sure to leave a couple of inches of BLANK SPACE where the back of the skirt will be, so there will still be some stretch to the waistline elastic! Otherwise, your little one won’t be able to get it on. I glued a feather halfway over another so it wouldn’t be totally blank there, but made sure it didn’t touch the elastic.

Adding last layer to skirt
Make sure to remove all your hot glue “strings” when done! :)
For the little cap-sleeves, definitely cut the smallest feather. I did three groups of feathers on each side for the sleeves. I did also use some sparkly material for a little extra touch on those! Not necessary, but who doesn’t love shiny things?

I went ahead and glued all my sleeve layers together before glueing to garment (glue under seam of sleeve, not on top of!) Remember when viewing the pic below, I made three feather groups for each side for the sleeves.
TUCK YOUR TOP into the skirt and fluff out those orange feathers over the red layer of the skirt! Makes it look like one piece :)
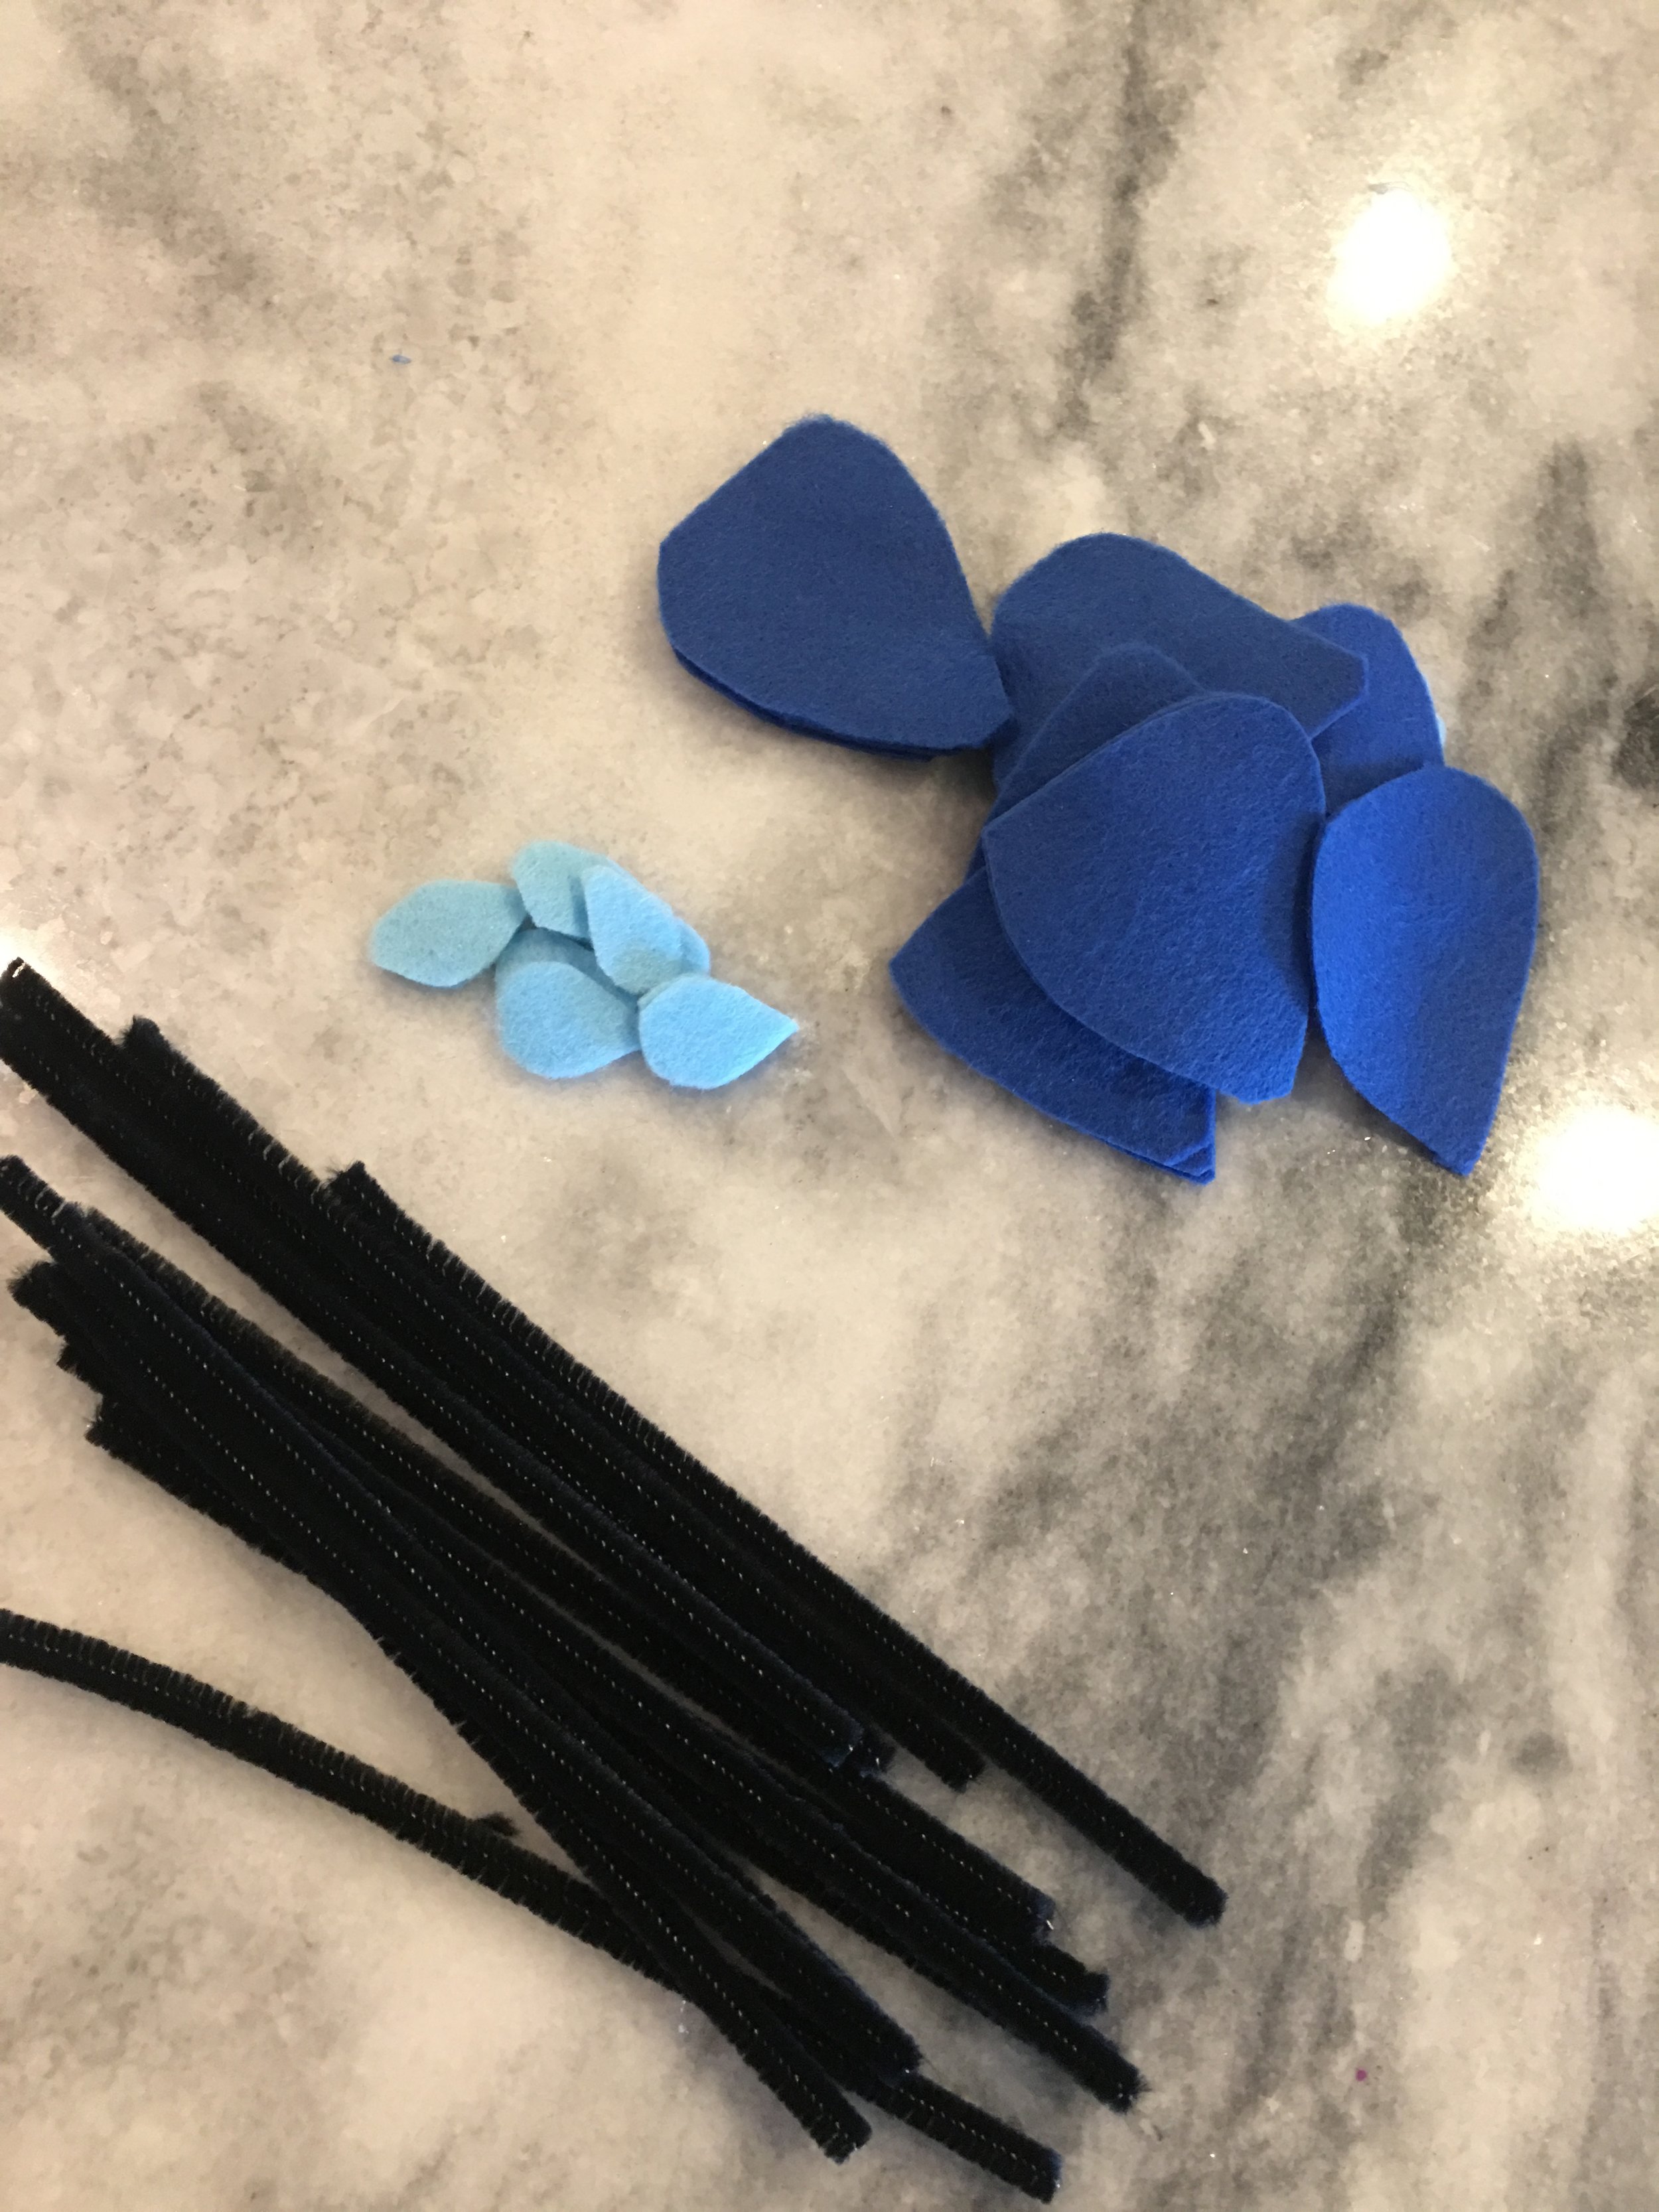
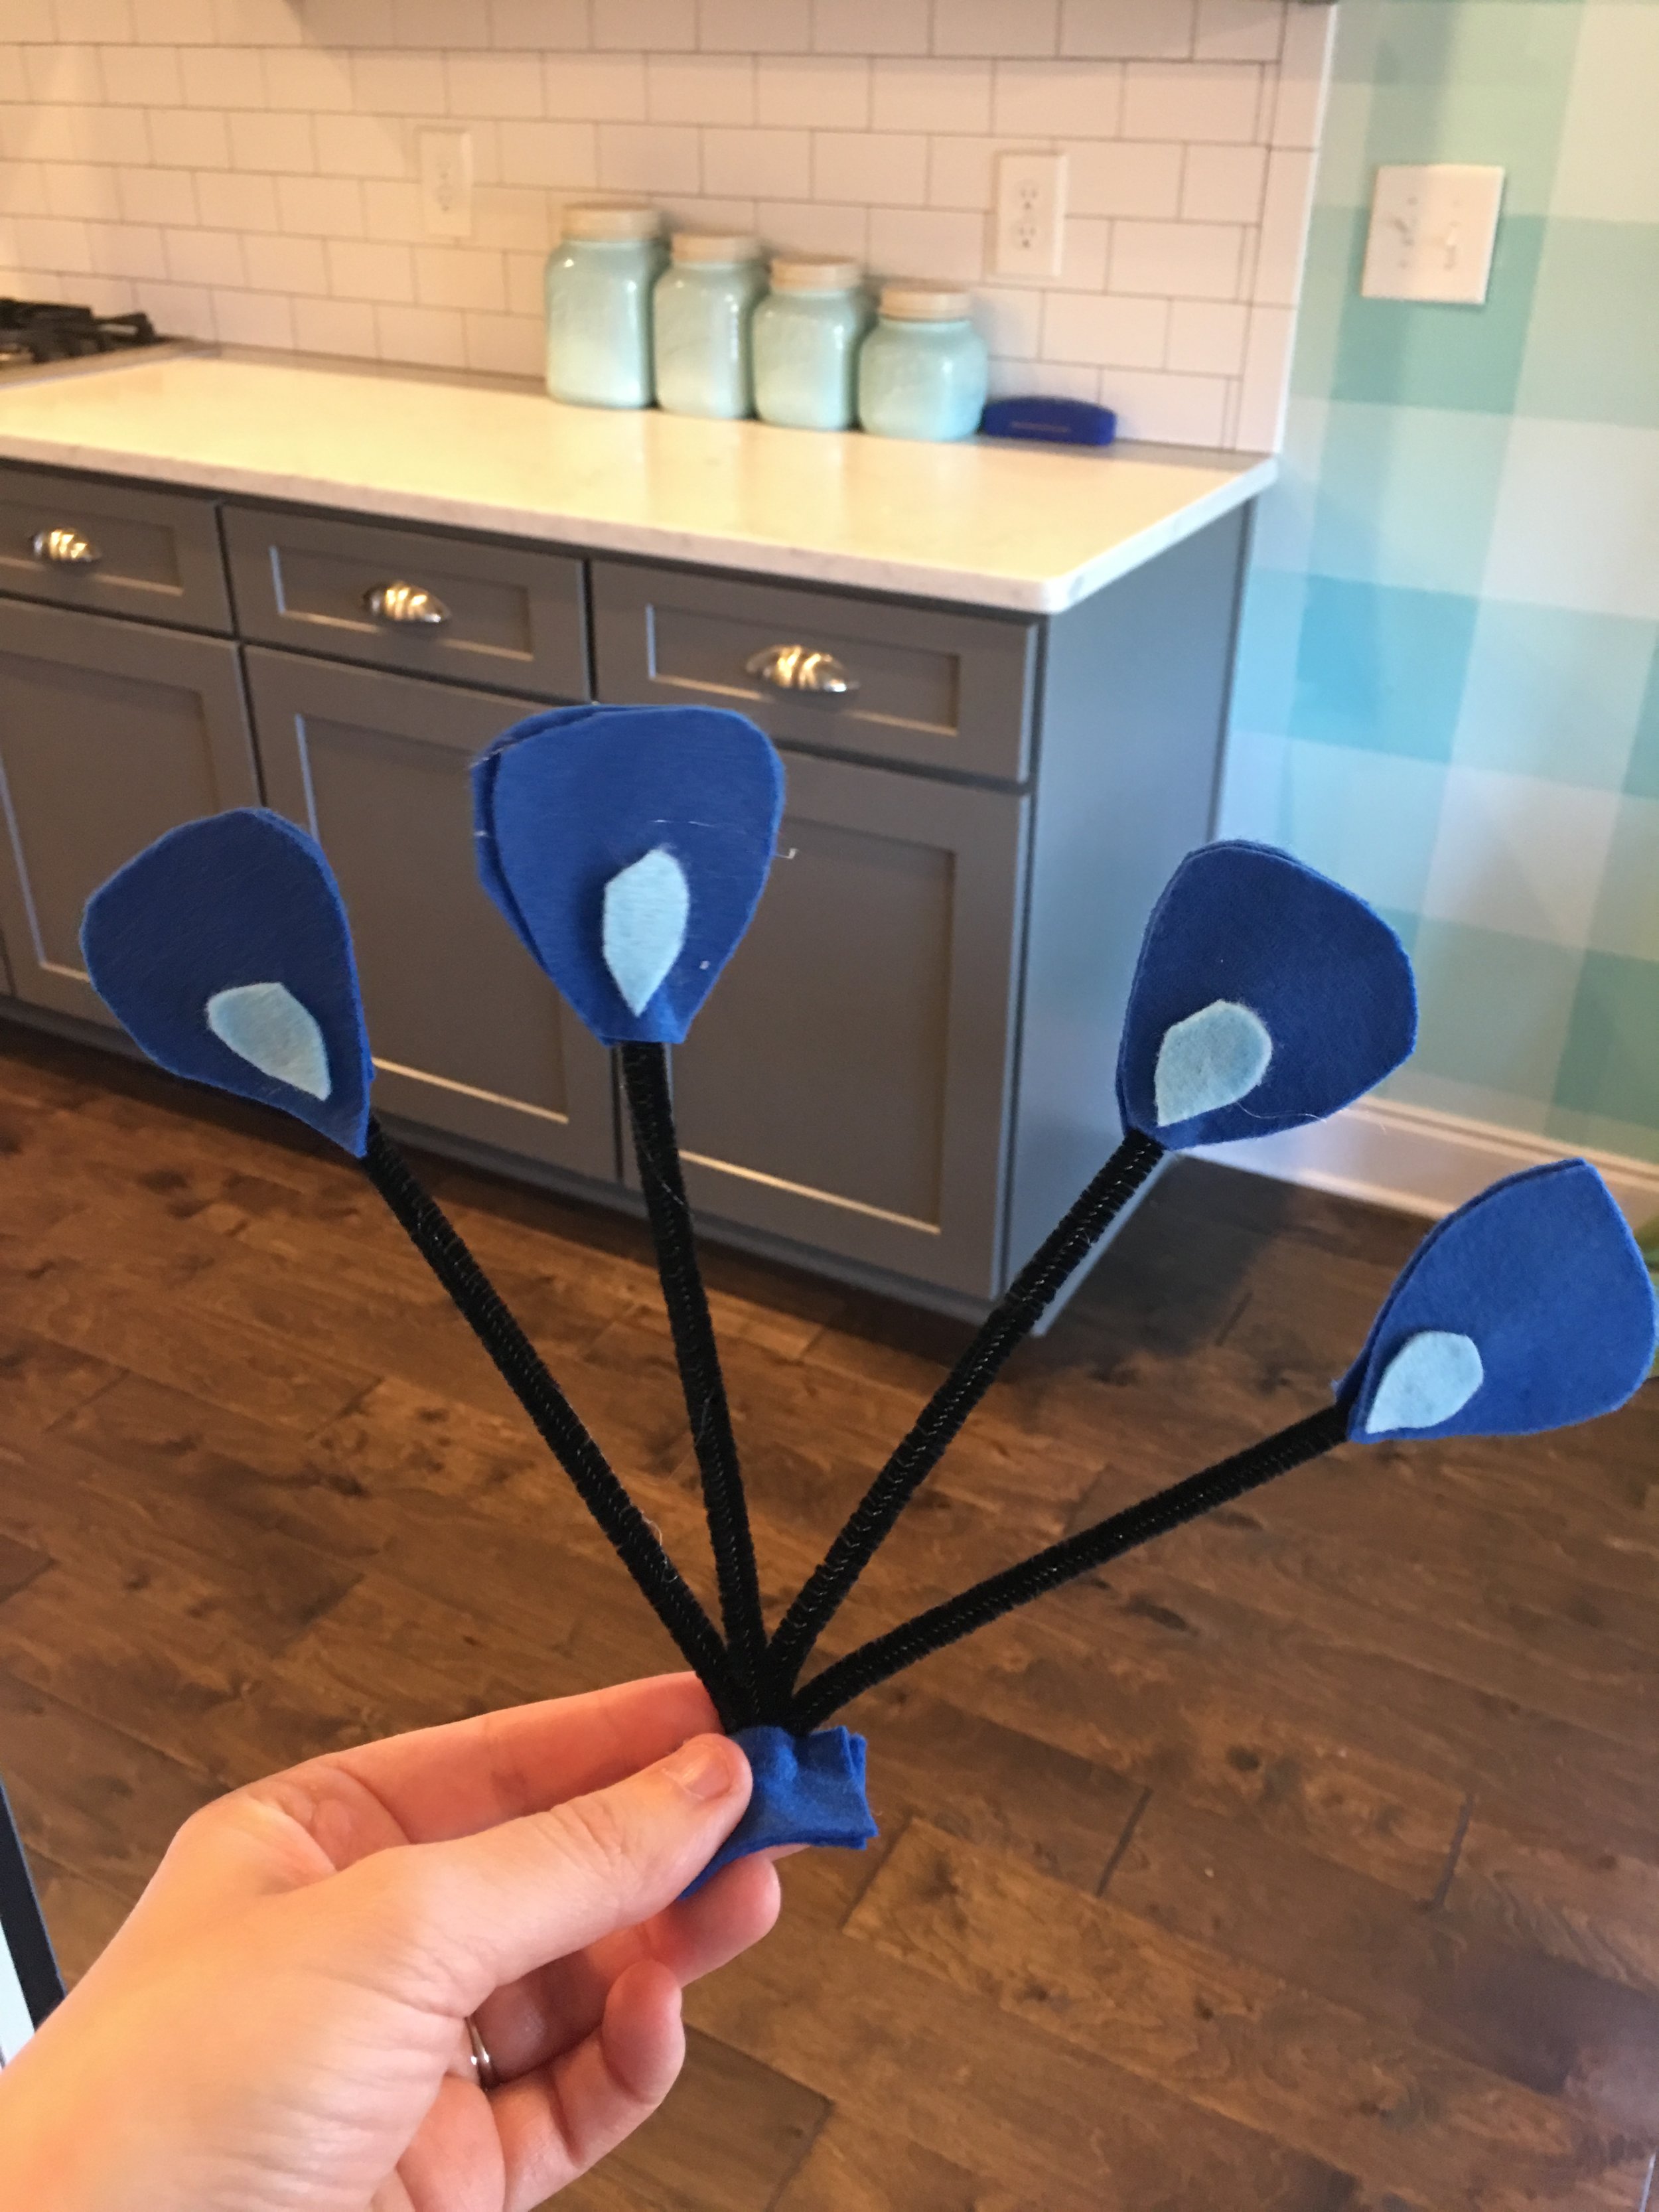
Now, for the extremely easy hair piece!
Simply cut 8 tear-drop shapes (one for front and one for back) to create 4 feathers. Cut 4 small tear-drops for the front of each feather. Place one shape on table, glue black pipe-cleaner, then glue another shape on top. Then, glue the smaller shape last, on top of the whole thing. I liked to have my pipe cleaners about 6-8 inches in length.
Cut two small squares of royal to glue all the feathers to when completed. I just grouped the four feathers together, twisted, and bent about an inch of the pipe cleaner at a 90-degree angle and sandwiched them between the two squares. This way, your bobby pins can cling onto the square when being pinned to your little’s head!
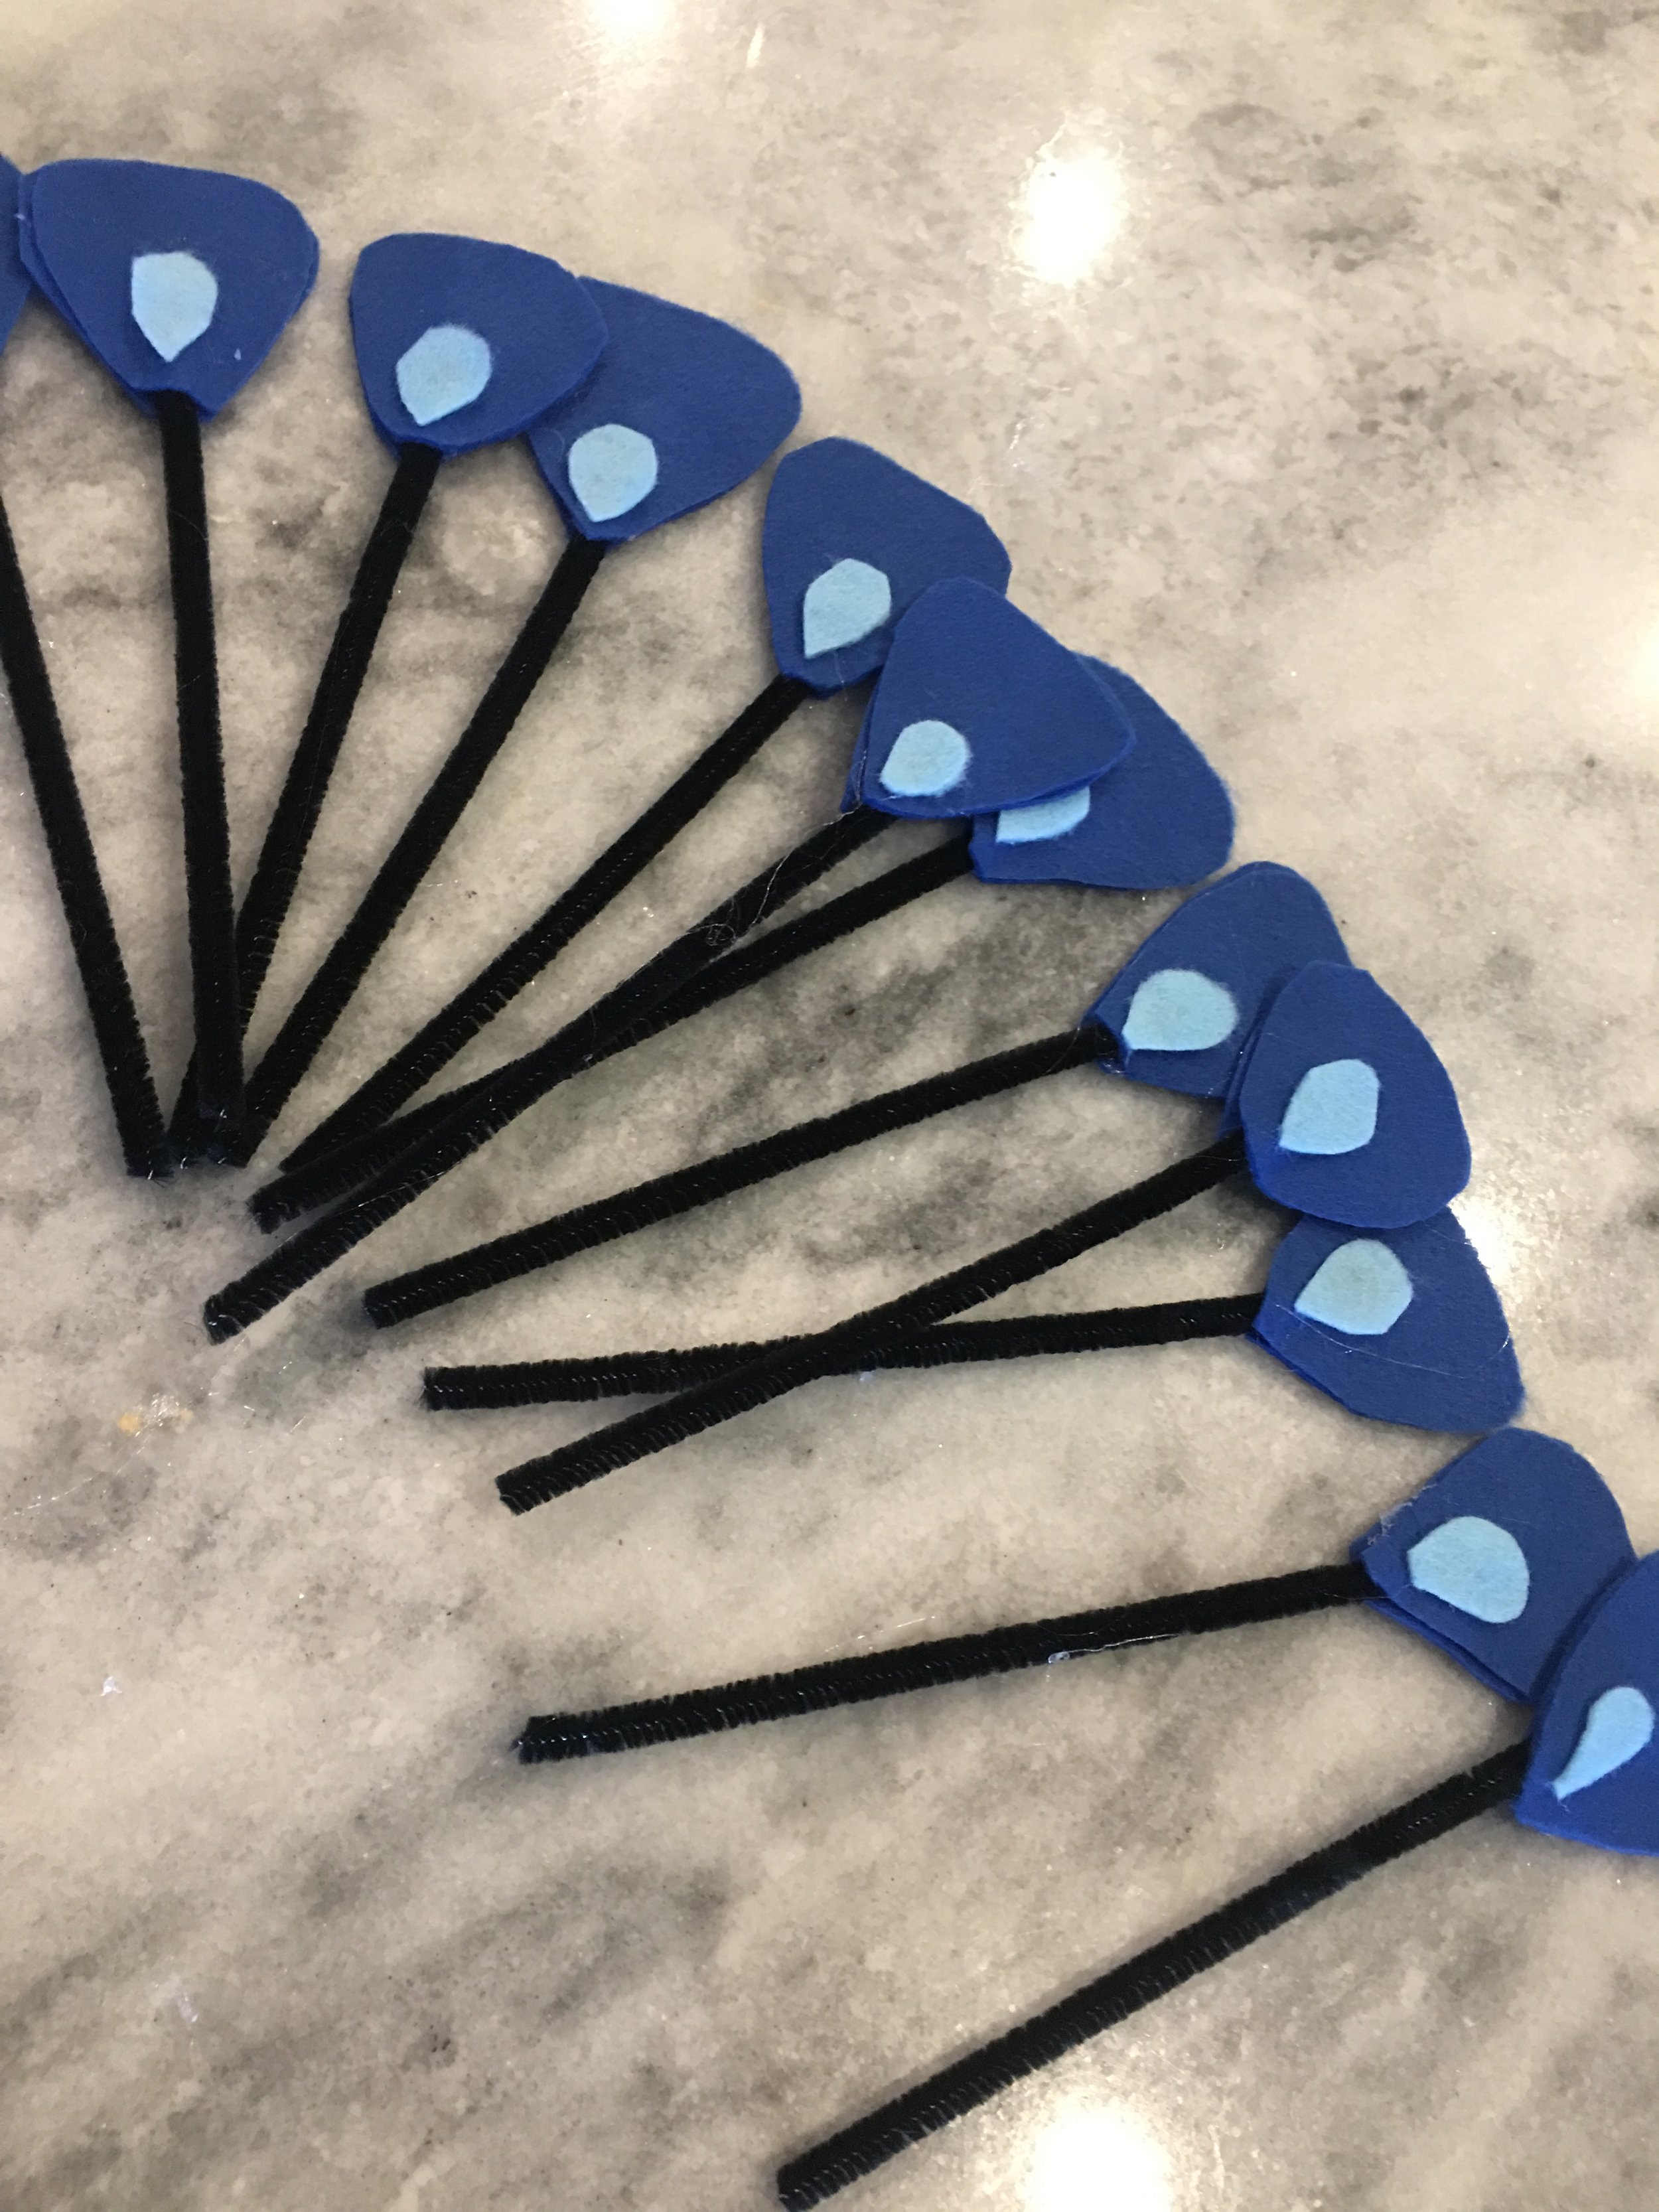
Remember, I made 3 of these outfits at a time! That’s why there are so many feathers in the pic above!
When pinning to their hair, make sure to use a clear rubber-band ponytail holder and make a small ponytail on top of their head. This gives you something to pin to :)
Finished product:

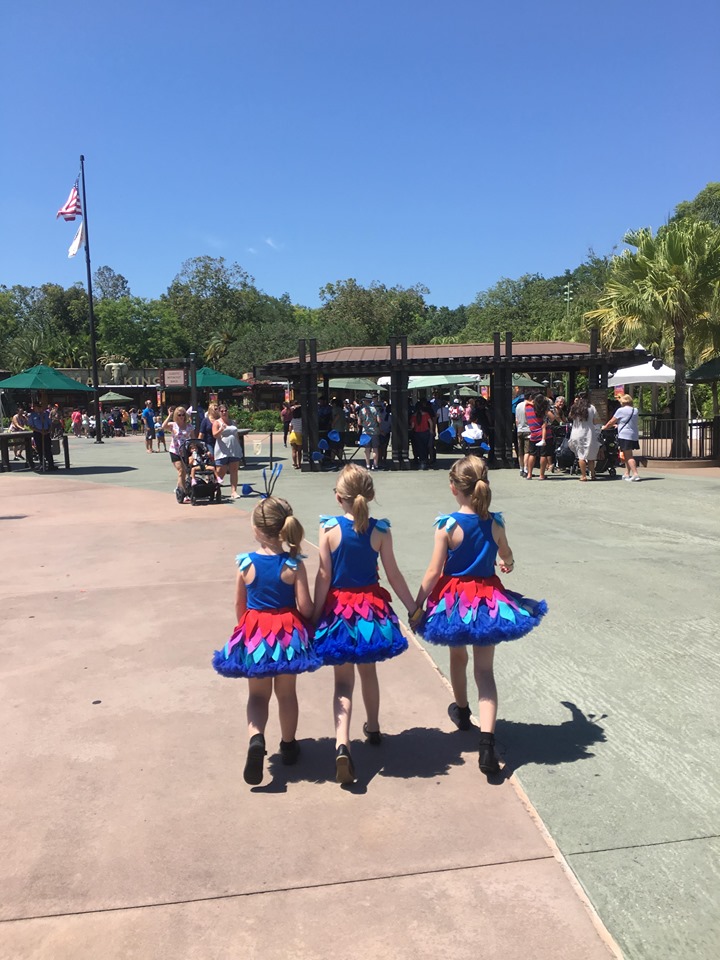
Here are some pics of our beautiful time with Kevin herself, putting these costumes to use!
Want to spread even more magic? Make gifts to hand out while wearing your costume! Wilderness Explorer badges hand-drawn by your little and cut out and laminated is one easy idea. Dream big and spread the magic!
Going to make your own baby Kevin? Make sure to hashtag #makingmainstreet on your IG so we can see your creation!